C2 Series Machine Maintenance Guide
Routine maintenance for the C2 series: lens cleaning, belt tension, timing-pulley balance and eccentric nut adjustment.
1. When Maintenance Is Needed
| Symptom | Possible Cause |
|---|---|
| Misaligned or shaky engraving | Loose belt, loose eccentric nuts |
| Gantry wobbles or shifts | Timing pulleys not locked, uneven tension on both sides |
| Bracket wobbles with a visible gap | Loose eccentric nuts |
| Lower laser power, shallower engraving | Dust on the lens, dust inside the protective cover |
2. Before You Start
- Power off: Turn off the machine and unplug the power cord. Wait until all moving parts have come to a complete stop.
- Tools: Hex keys (included), open-end wrench, cotton swabs, anhydrous alcohol, lint-free cloth.
- Workspace: Work on a flat, stable table. When turning the machine over, support the body to avoid pulling on cables or limit switches.
Tip: The three adjustments above are interrelated. Abnormal belt tension affects gantry balance, and an unbalanced gantry can mask problems with the eccentric nuts. Work in this order: belt → timing pulleys → eccentric nuts.
3. Cleaning the Lens
Dust on the lens blocks the laser beam and is the most common cause of power loss. Clean the lens whenever you notice the laser becoming weaker.
- Remove the red protective cover in front of the laser module.
- Dip a round-tipped cotton swab in a small amount of anhydrous alcohol and wipe the lens in a circular motion to lift off the dust.
- Wait for the alcohol to evaporate and the lens to dry, then reinstall the protective cover.
Caution: Do not press hard while wiping, and never touch the lens surface with tweezers, the hard corner of a tissue, or similar objects, as this can scratch the coating. After large-area engraving or prolonged cutting, also clean the dust inside the red protective cover.
4. Adjusting Belt Tension
Applies to: Loose belts that cause misaligned or shaky engraving.
-
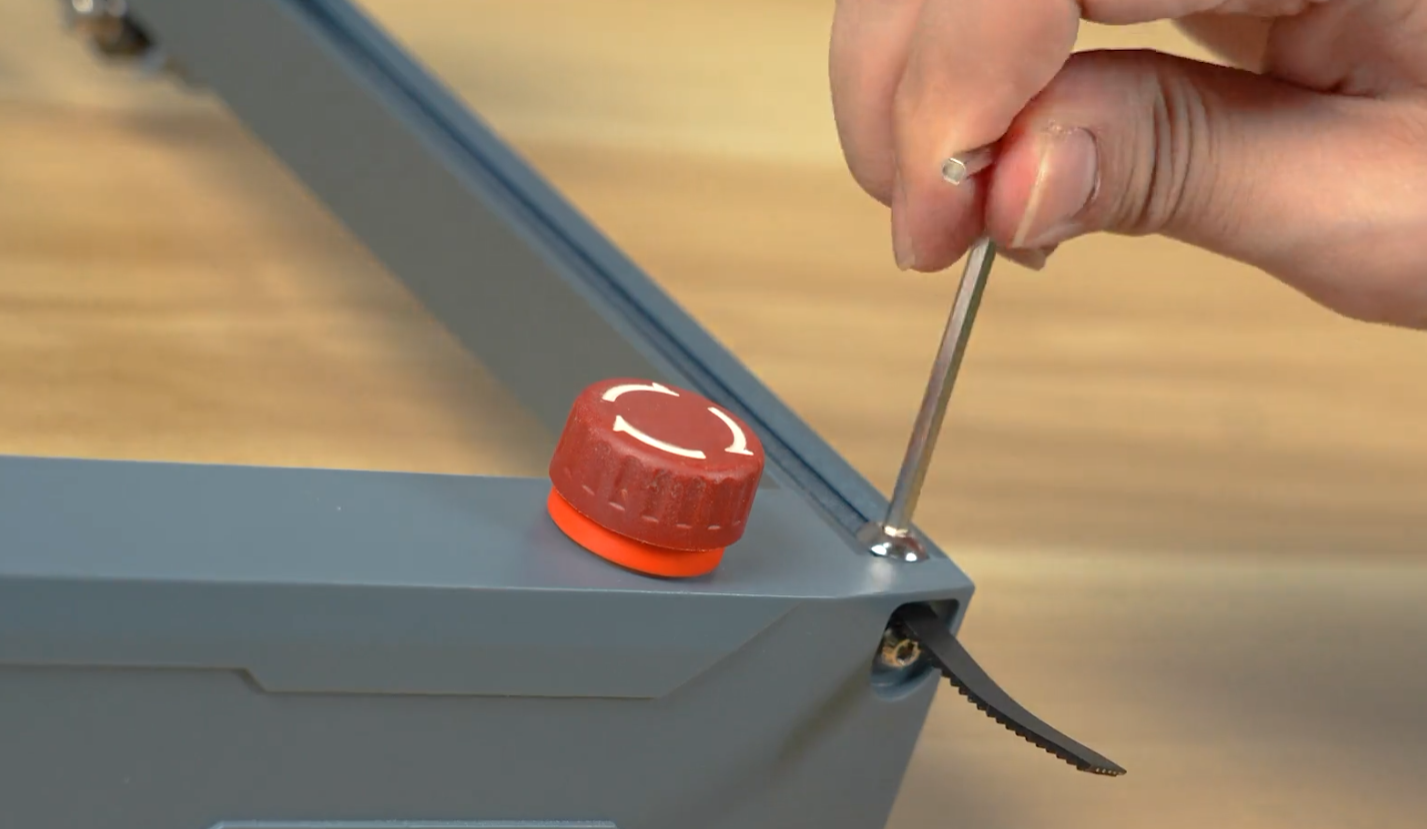
Locate the belt fixing screw at the end of the beam and loosen it with a hex key (no need to remove it completely).
-
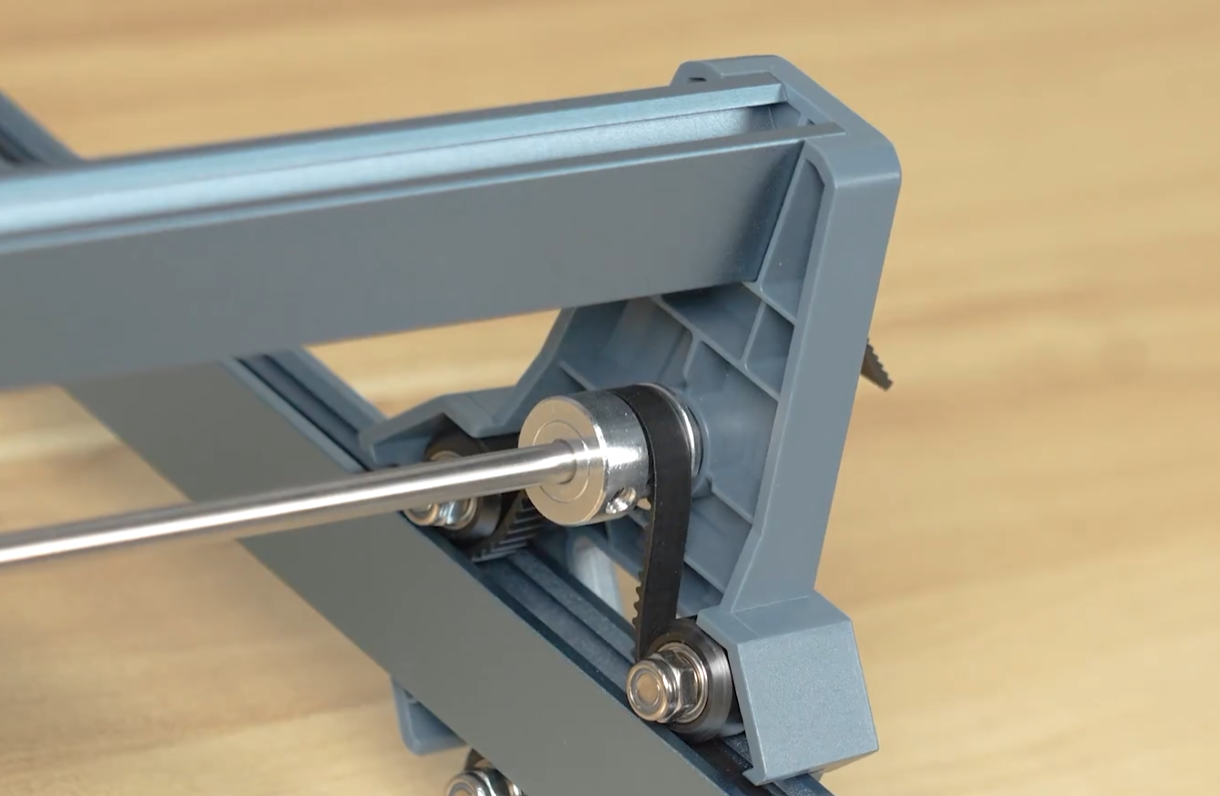
Pull the belt tight by hand and hold the tension.
-
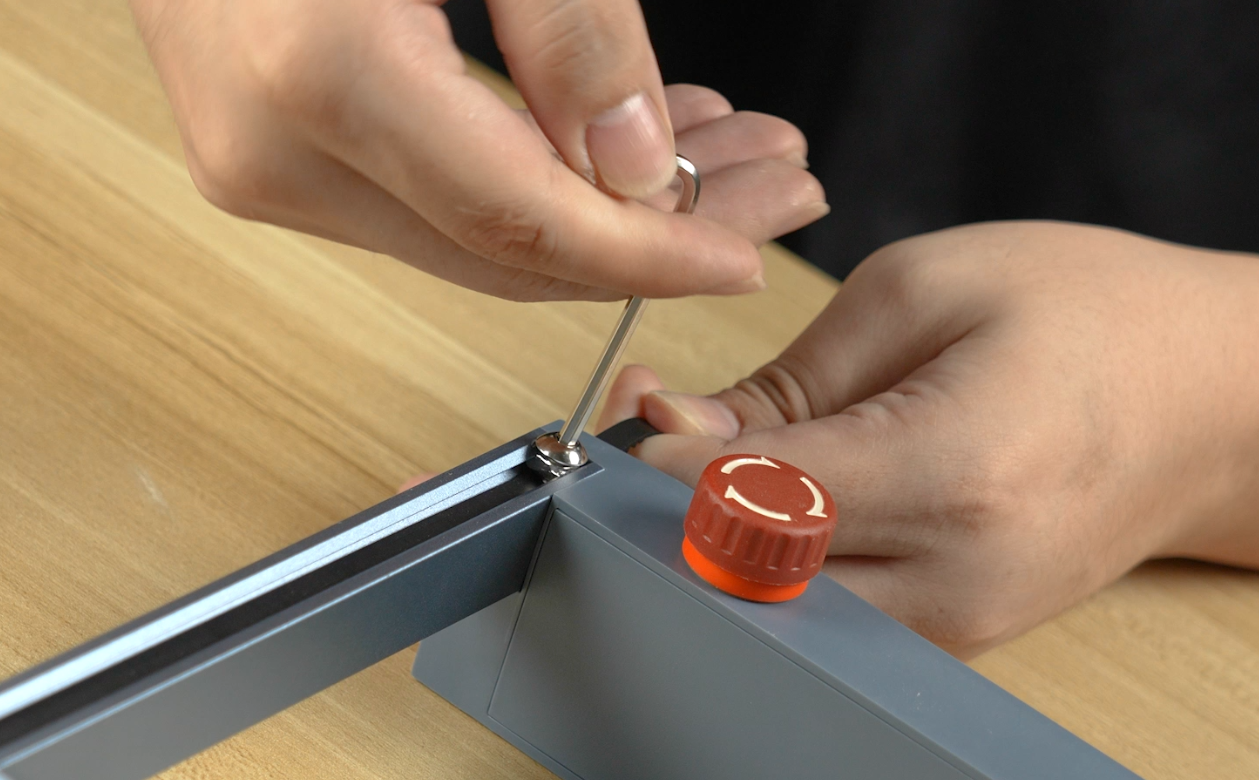
While holding the belt tight, retighten the fixing screw and check the belt tension.
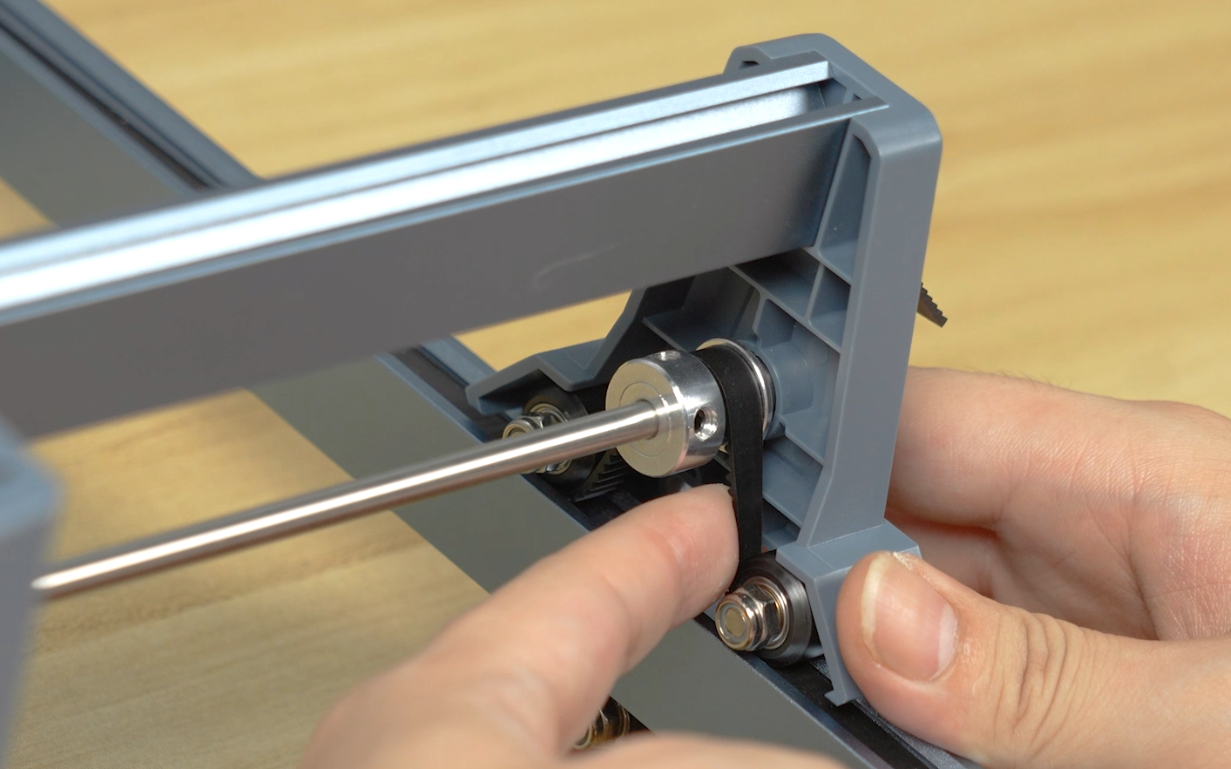
Check: The belt tension on both sides should be roughly equal. Press the belt lightly with a finger: it should deflect a moderate amount and spring back, with no slackness.
5. Balance Adjustment (Timing Pulleys)
Applies to: A wobbling or shifting gantry. After adjusting the belt, use this section to confirm that both sides are balanced.
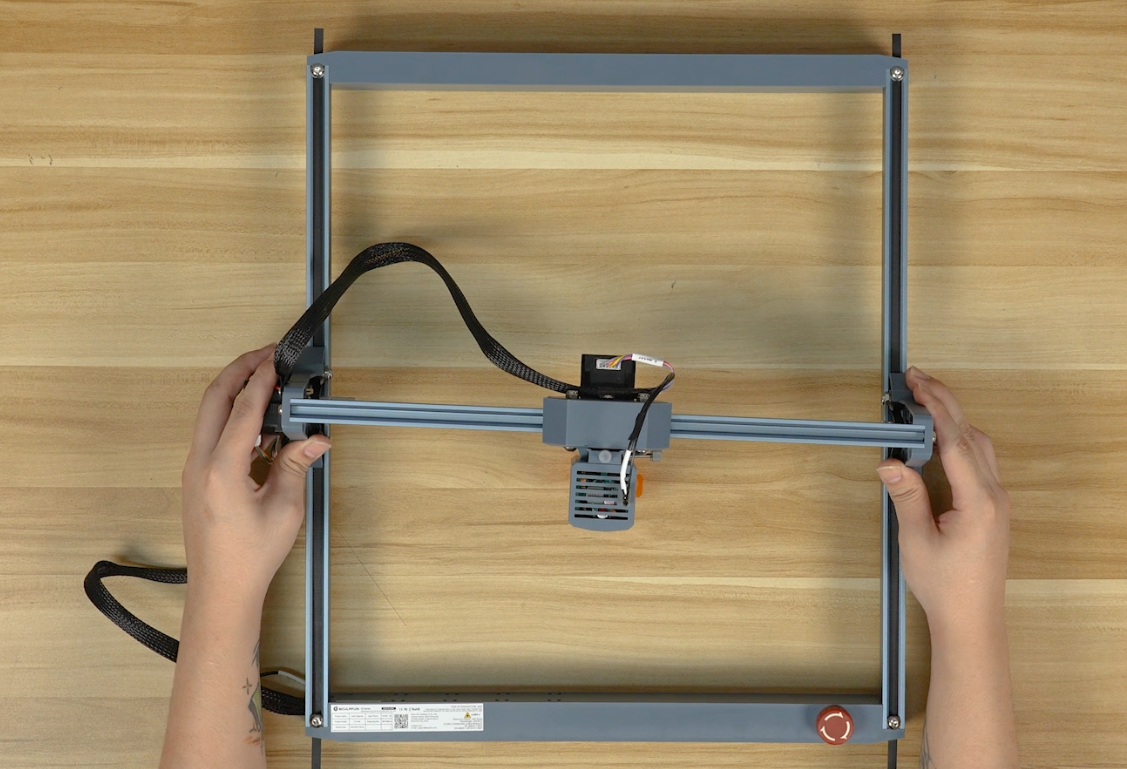
- First confirm that the belt tension is correct (see Section 4).
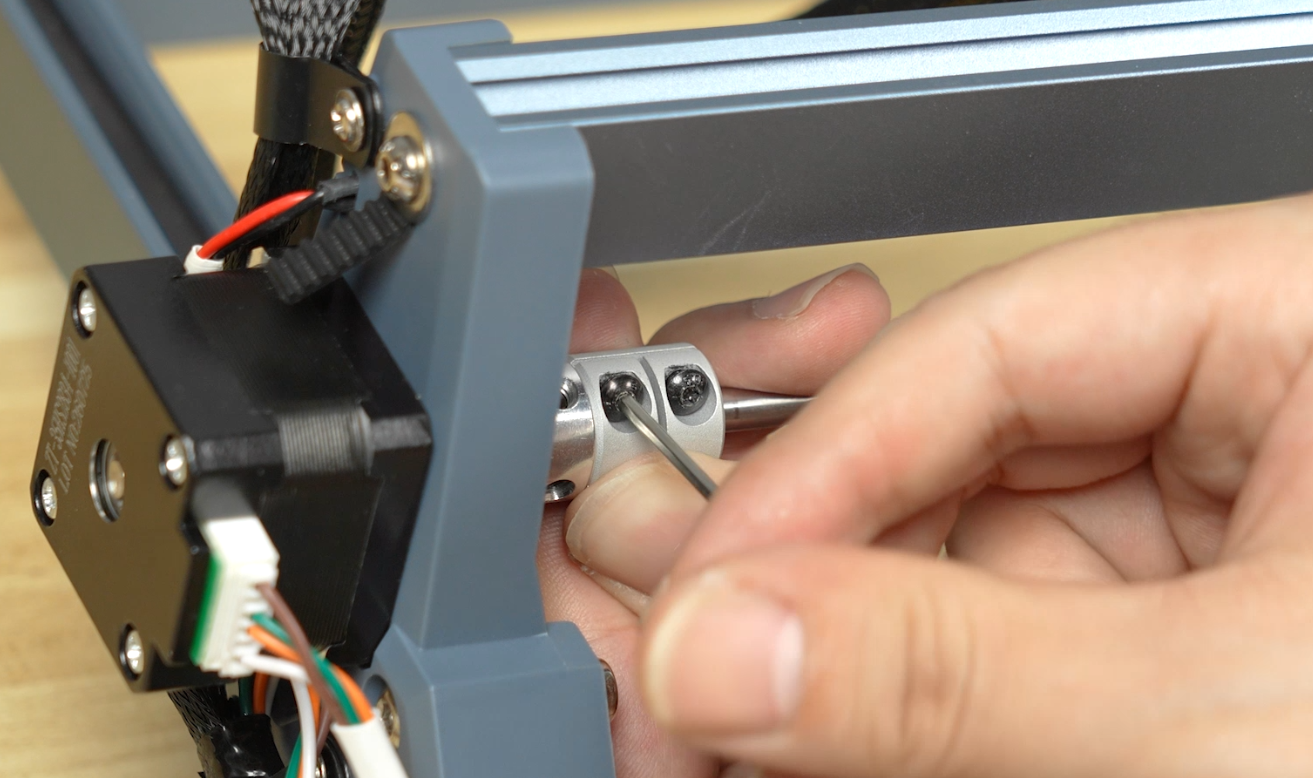
-
Loosen the two screws on the timing pulleys.
-
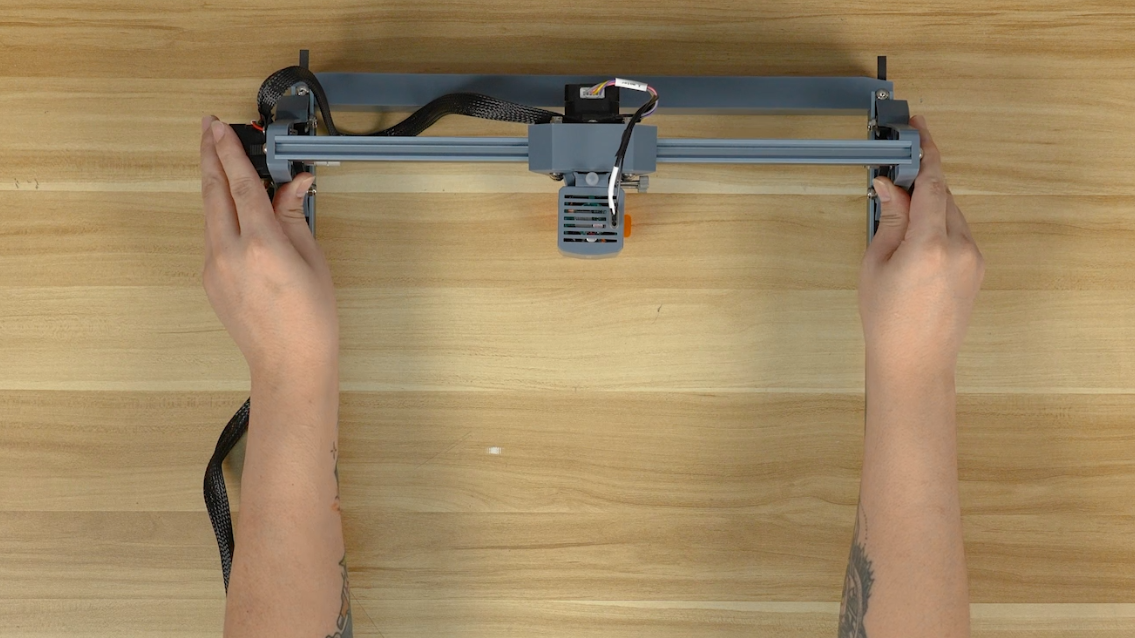
Push the gantry all the way to the back so that both ends rest firmly against the rear beam and stay parallel to it.
-
While holding the gantry against the rear beam, retighten the two screws on the timing pulleys.
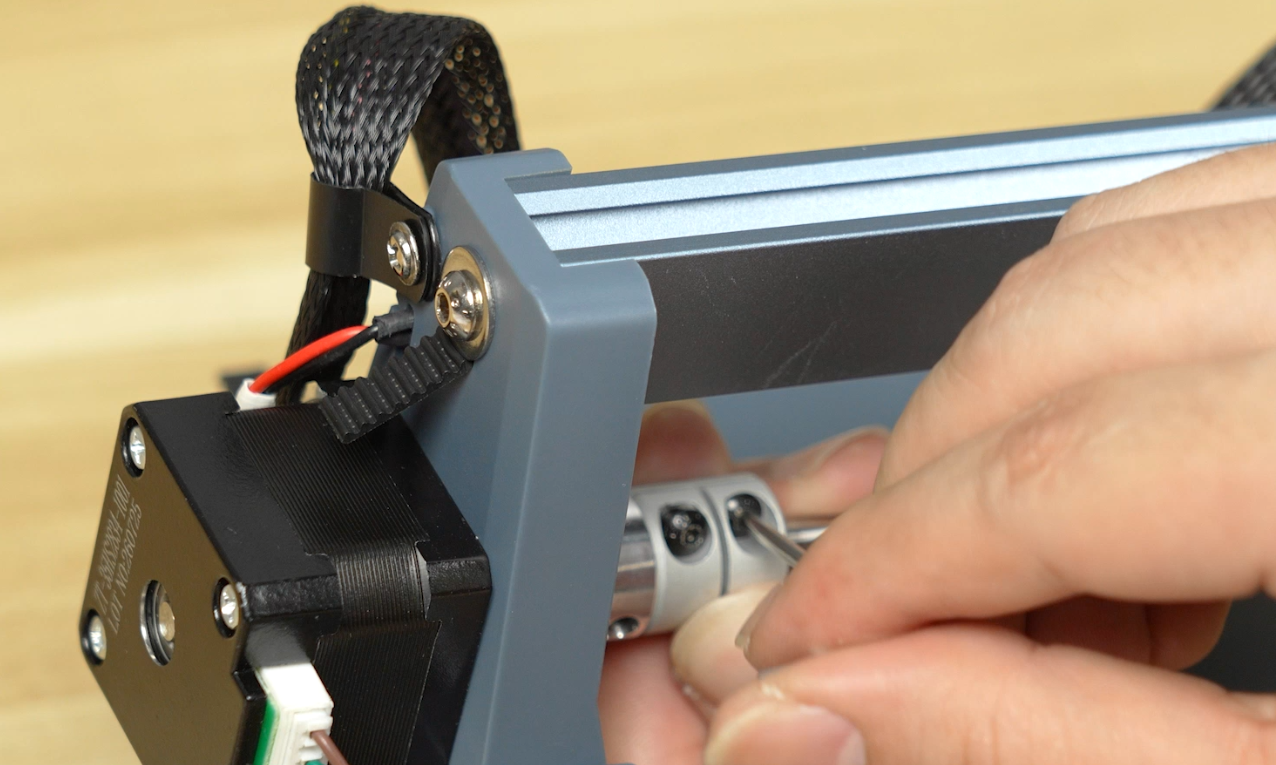
Check: Slide the gantry left and right. It should move smoothly with no binding and no noticeable wobble, and both ends should be the same distance from the rear beam.
6. Adjusting the Eccentric Nuts
Applies to: A wobbling bracket with a noticeable gap. Loose eccentric nuts also cause misaligned and shaky engraving.
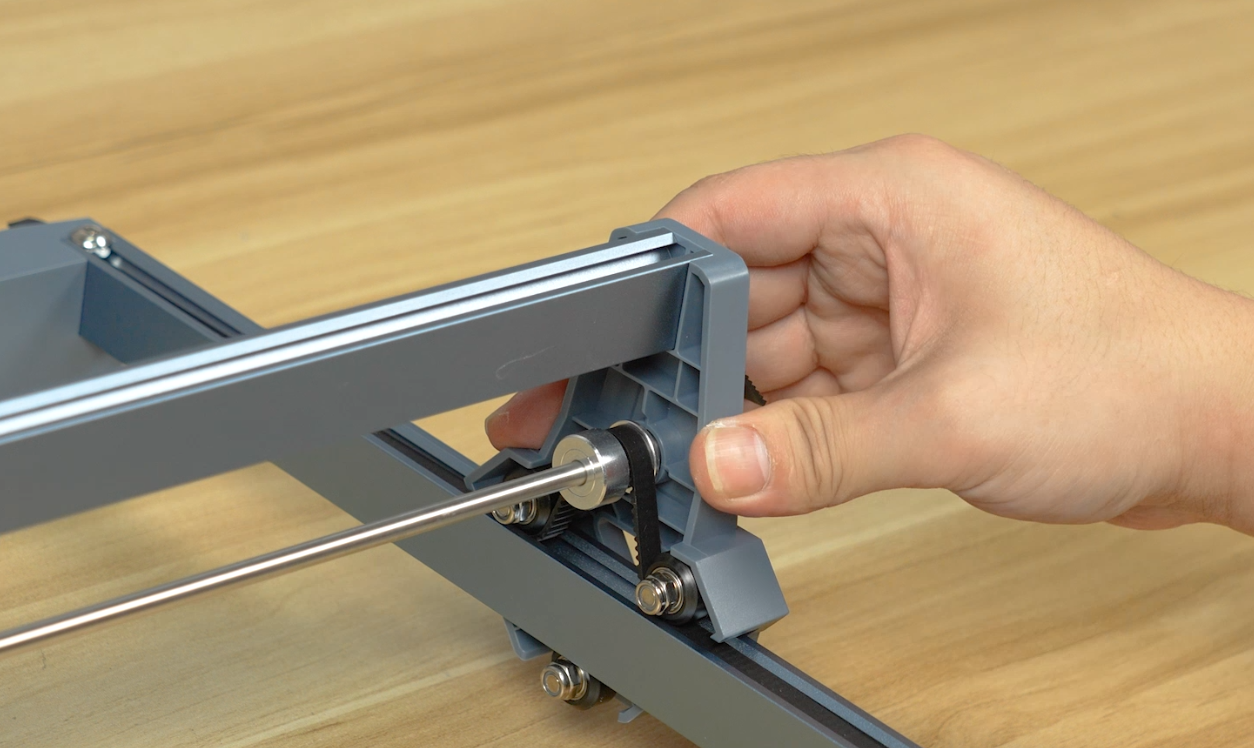
1. Y-Axis Eccentric Nuts
-
Rock the brackets on both sides to feel whether there is significant wobble or a large gap.
-
Turn the machine over and adjust the eccentric nuts on both sides with an open-end wrench. Rotating the nut changes how tightly the wheels press against the rail.
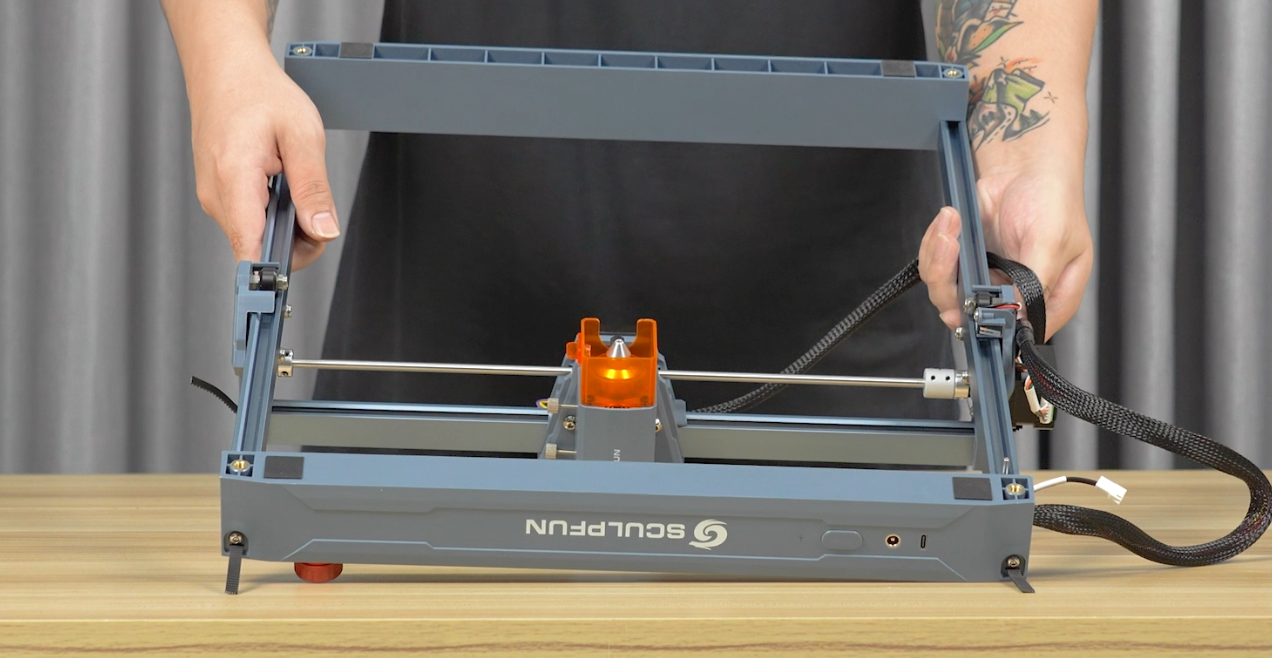
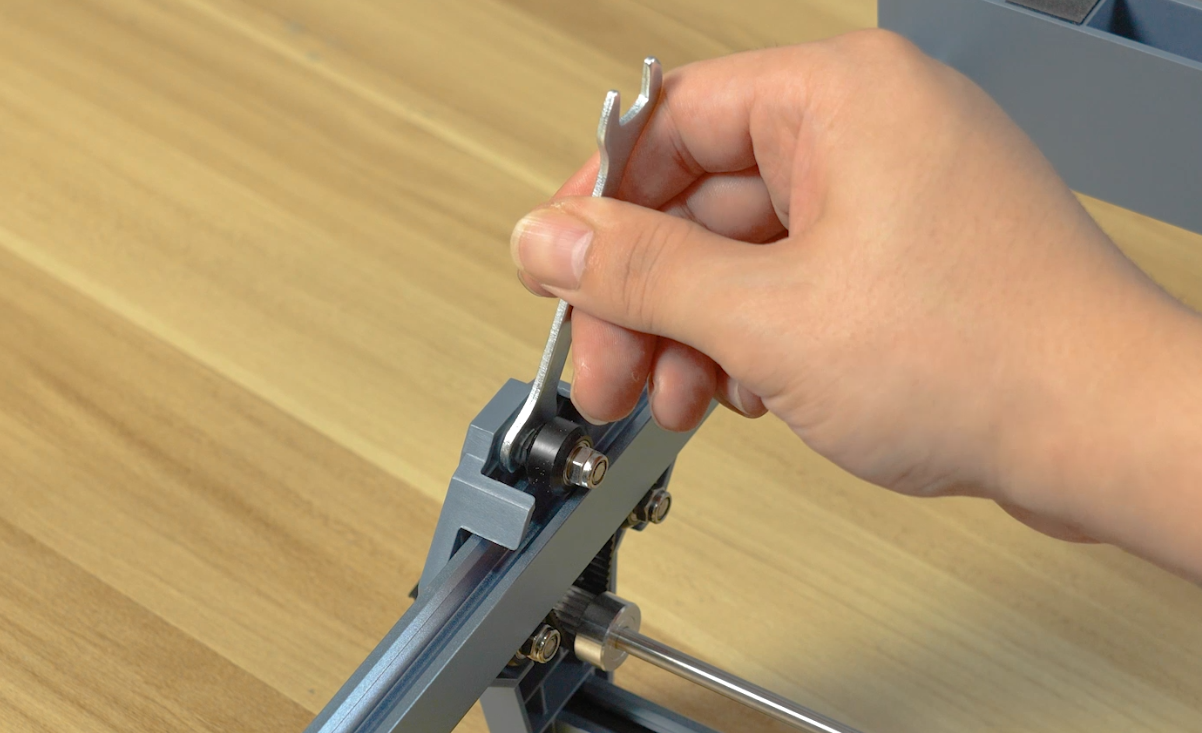
- Slide the gantry back and forth to feel whether it moves smoothly. Repeat the fine adjustment until the bracket no longer wobbles.
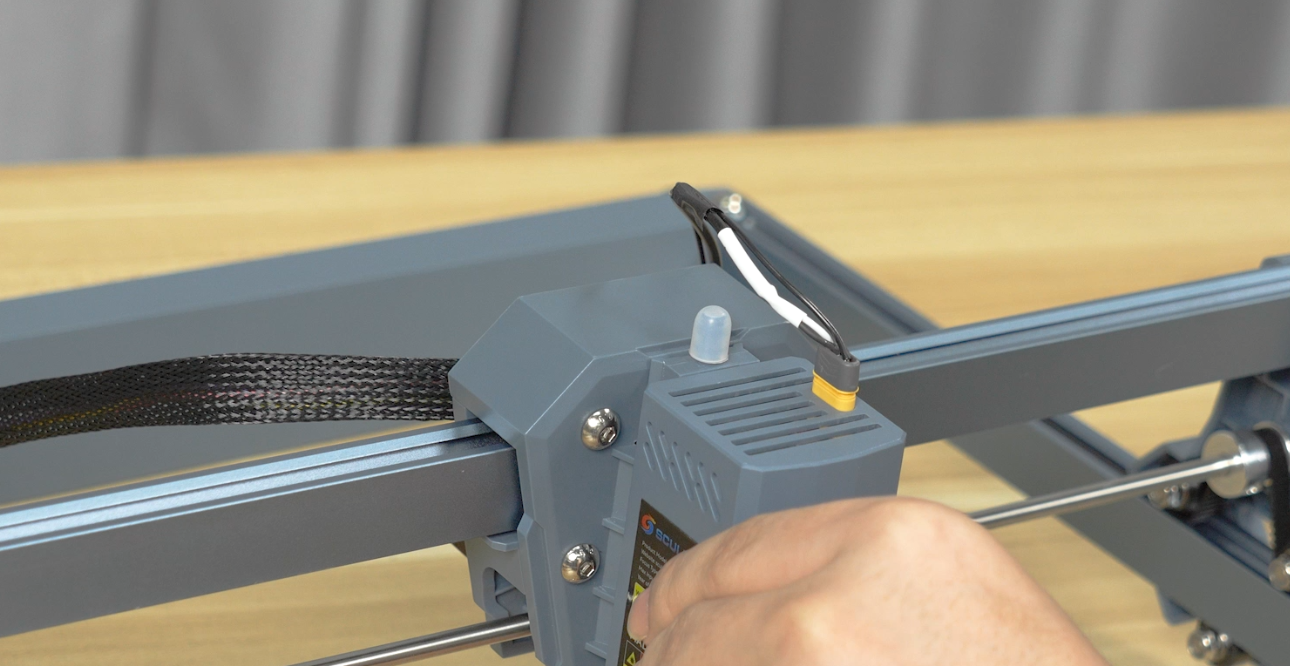
2. X-Axis Eccentric Nuts
-
Rock the laser module bracket back and forth to feel for wobble and gaps.
-
Following the same method as for the Y-axis, adjust the two eccentric nuts on the laser module bracket.
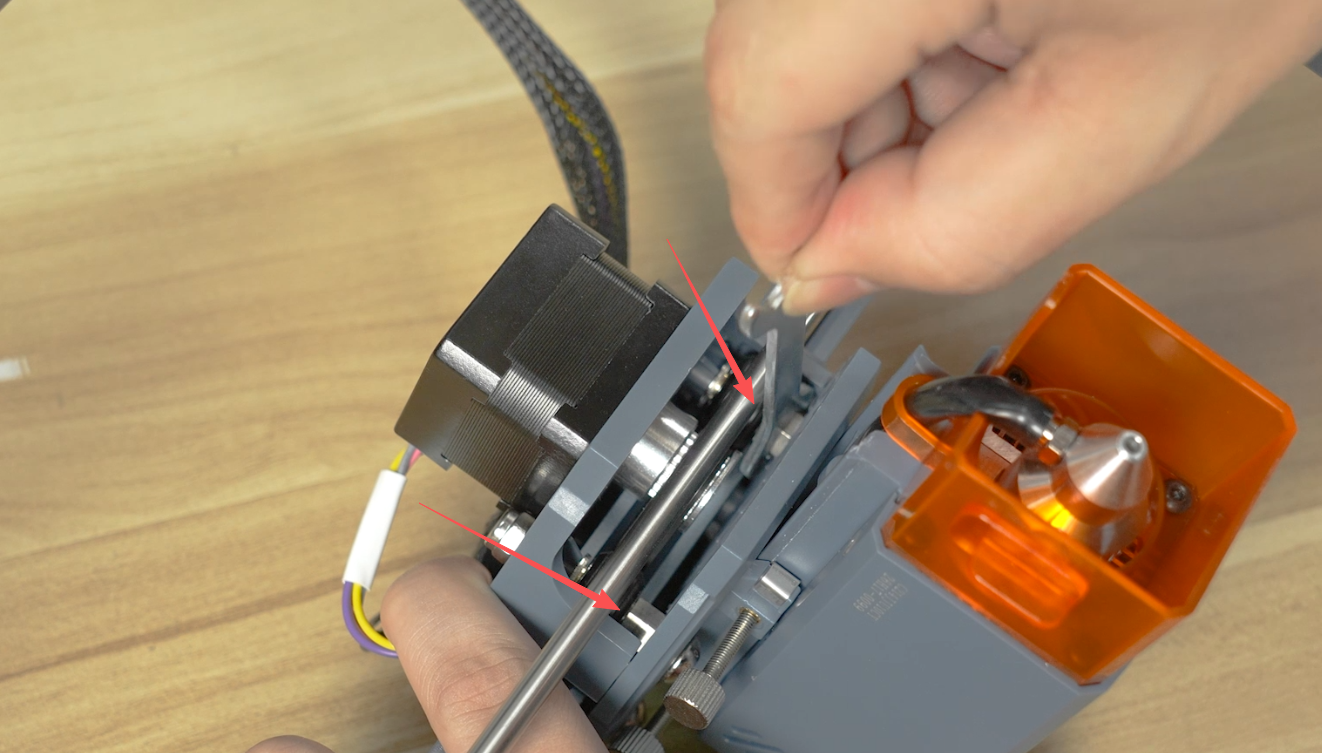
- Slide the laser module bracket left and right to feel whether it moves smoothly. Continue until it no longer wobbles.
Tip: Follow a "looser rather than tighter" principle when adjusting eccentric nuts — overtightening increases friction between the wheels and the rail, which can cause binding and even damage the rail. Aim for "no wobble and smooth sliding", adjusting gradually.
7. Routine Care and Usage Notes
- After large-area engraving or prolonged cutting, clean the dust inside the red protective cover.
- Clean the lens whenever the laser weakens, using a round-tipped cotton swab with a small amount of alcohol in a circular motion.
- Avoid running at 100% power for extended periods, to reduce the load on the laser module and lens and extend service life.
- Place the included steel plate under the material to protect the tabletop and reduce reflection.
- Check belt tension and the eccentric nuts regularly. If misalignment or wobble appears, adjust as described in this guide.
- Before each power-on, check the limit switches and cable connections to make sure nothing is pinched or disconnected.
Safety and handling requirements: (1) All mechanical adjustments must be made with the power off. (2) Do not over-tighten screws or nuts, to avoid stripping threads or cracking plastic parts. (3) Handle the machine gently when turning it over, and avoid pulling on cables or limit switches. (4) After adjusting, slide each axis by hand to confirm smooth movement before powering on for a test.
Once the adjustments are complete, power on the machine and run a Frame preview to observe how the gantry and laser module bracket move through the full travel range.