G20 Lightburn User Guide
Sculpfun G20 Galvo Laser LightBurn Tutorial
Applicable Model Sculpfun G20 (and all Sculpfun galvo lasers) Applicable Software LightBurn Pro
The G20 is a galvo laser and must be used with the LightBurn Pro version. This guide walks you through the complete workflow, from downloading and installing LightBurn and importing the machine configuration file to completing your first engraving. Just follow the steps and you will be up and running.
1. Downloading and Installing LightBurn
1. Visit the LightBurn Website to Download the Software
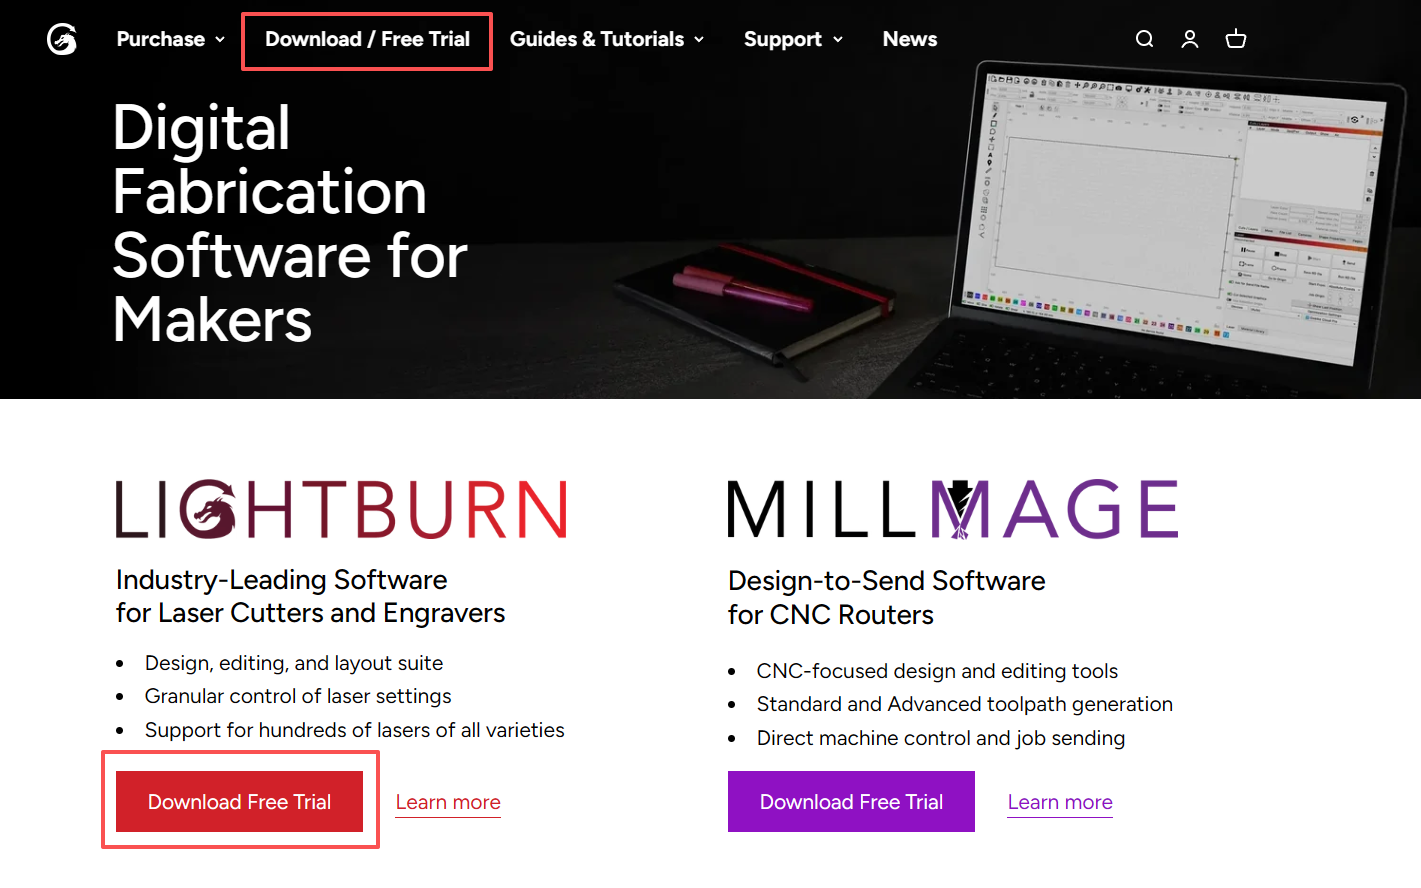
Open your browser and go to the LightBurn website. Click Download / Free Trial in the upper-left corner of the page to open the download page, or click Download Free Trial below to download directly.
2. Choose the Version for Your Operating System and Install
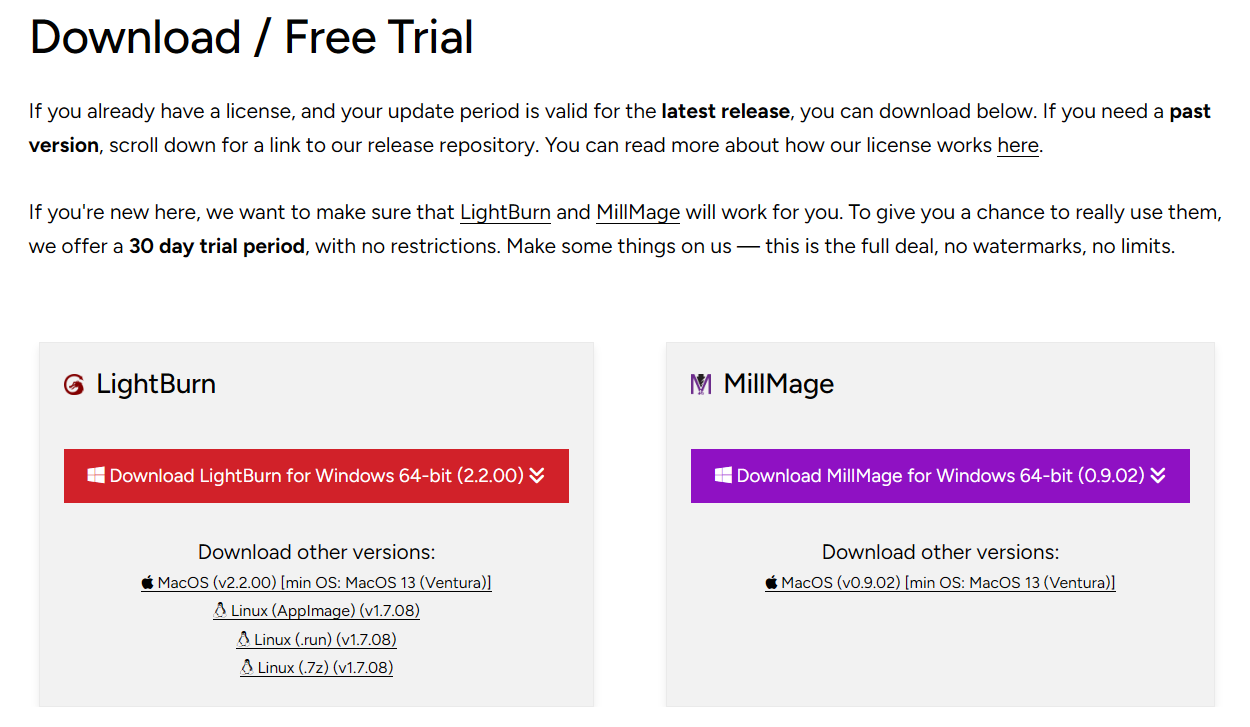
Download the version that matches your computer's system. This guide uses Windows as an example. Once the download is complete, follow the prompts to finish the installation.
3. Open the Software and Understand the Trial and Activation Rules
After the installation is complete, open LightBurn. New users get a 30-day free trial. After the trial period ends, you need to purchase a LightBurn license key to keep using the software.
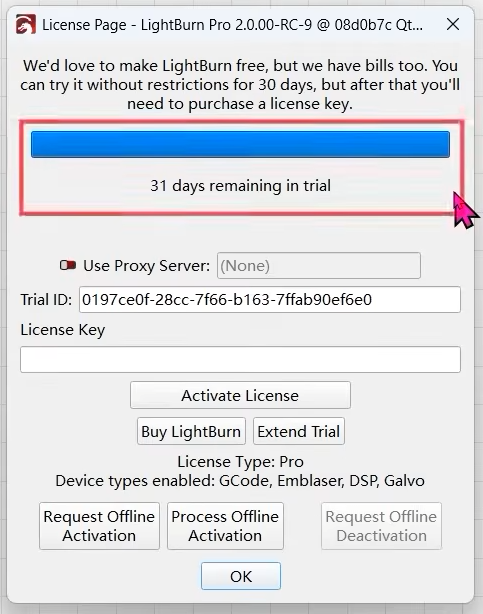
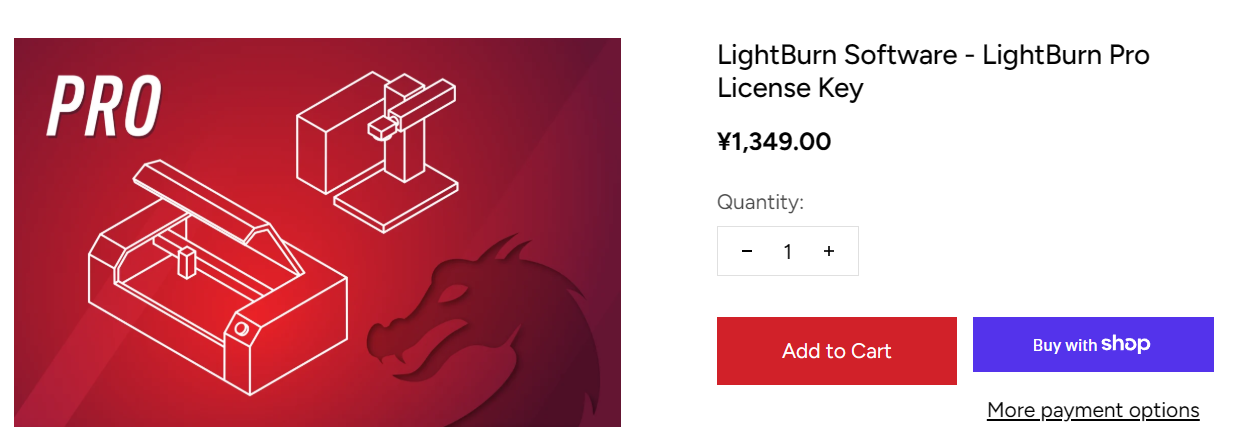
Tip: The G20 is a galvo laser, so it requires the LightBurn Pro version. Choose the Pro version when purchasing a license key. On the activation page, "Device types enabled" shows the device types supported by your current license (including Galvo).
2. Importing the G20 Machine Configuration File
4. First Launch: Create a Device Profile
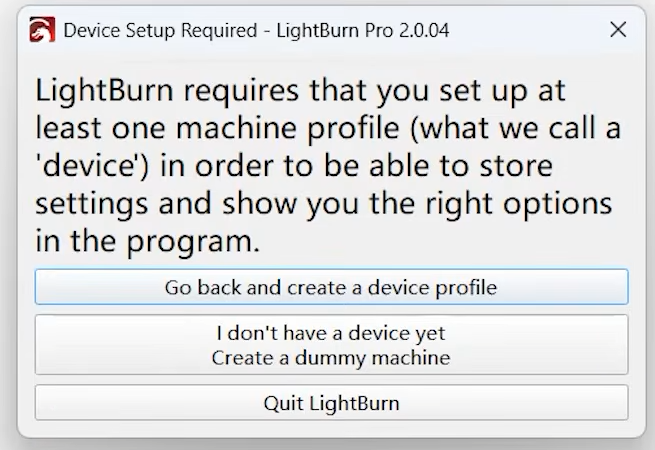
The first time you open the software, a prompt appears: LightBurn needs at least one machine profile (device) to store its settings. Click "Go back and create a device profile" to go back and create one. This guide creates the device by importing the G20 configuration file.
5. Locate the USB Flash Drive Included with Your Machine
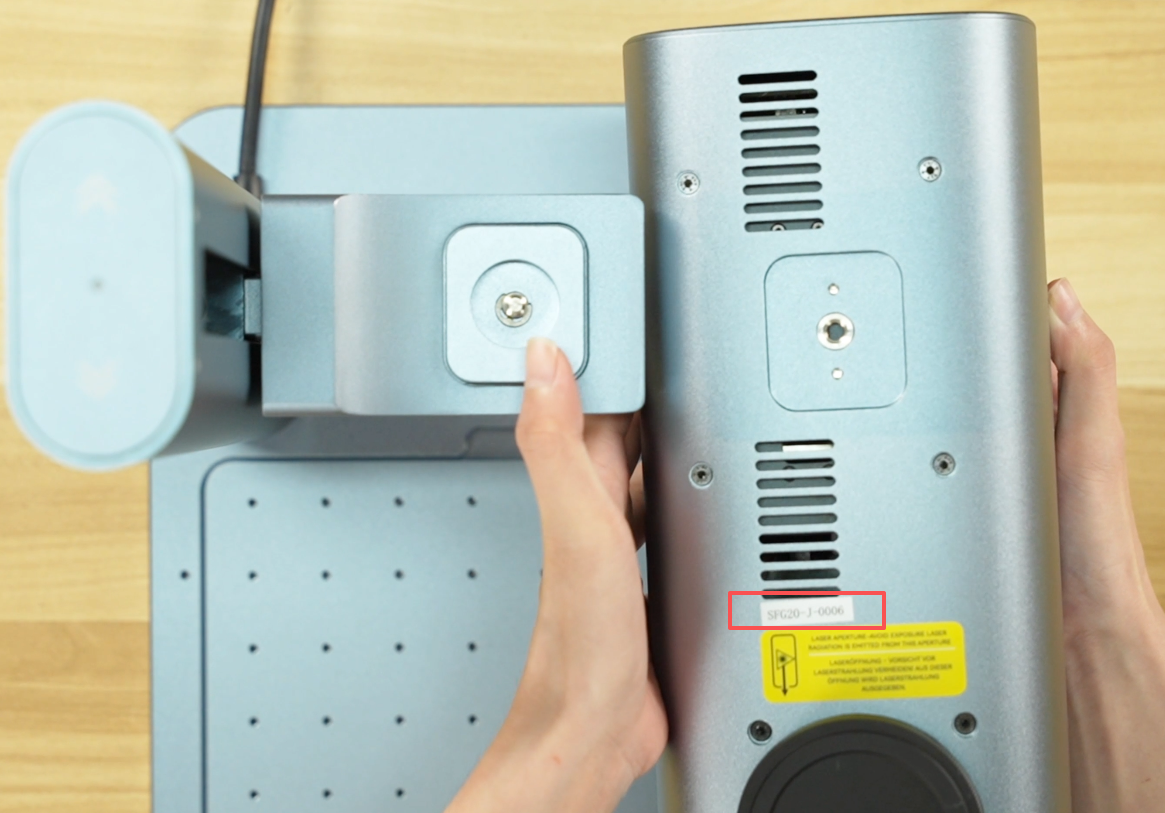
The G20 configuration file is stored on the USB flash drive included with your machine. Plug the drive into your computer. The machine SN code is printed on the drive's label, and the configuration file is bound to that SN code.
Tip: If you lose the USB drive, you can contact Sculpfun customer service with the machine SN code to look up the configuration file. Please keep the drive in a safe place.
6. Import the Configuration Bundle
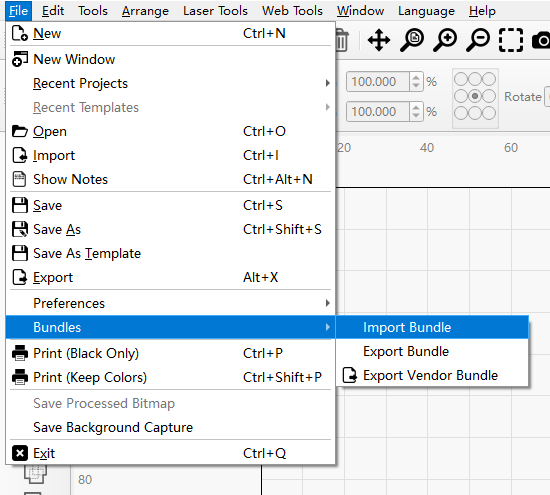
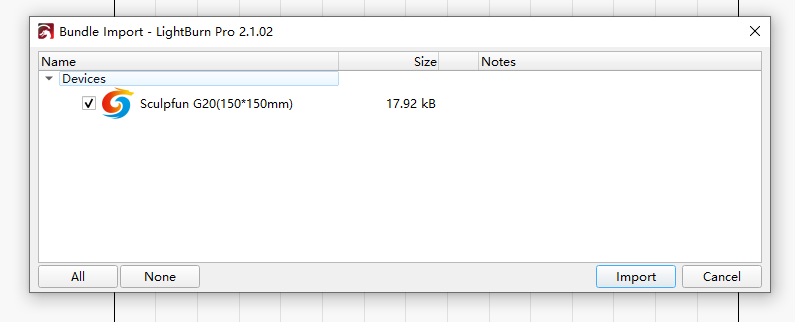
In LightBurn, click the menu in the upper-left corner: File → Bundles → Import Bundle. In the dialog that opens, select the Sculpfun G20.lbzip (LightBurn configuration file) on the USB drive and click "Open" to import it.
7. Select the G20 Device
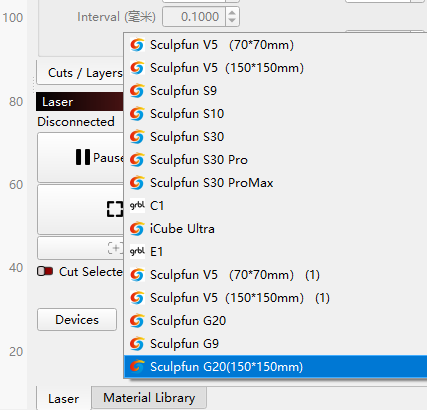
After importing, select Sculpfun G20 from the Devices drop-down list in the lower-right corner of the software, and the device is created.
3. Configuring Device Parameters
8. Set the Galvo Parameters According to the Calibration Image on the USB Drive
Click Laser Tools → Device Settings. On the Galvo and Basic Settings tab, change the field lens and galvo parameters to the values shown in the image inside the 0. Calibration parameter → 150mm lens folder on the USB drive.
Tip:The configuration fileis stored on the USBflash drive includedwith your machine.Parameters vary byunit; the providedillustrations are forreference only.
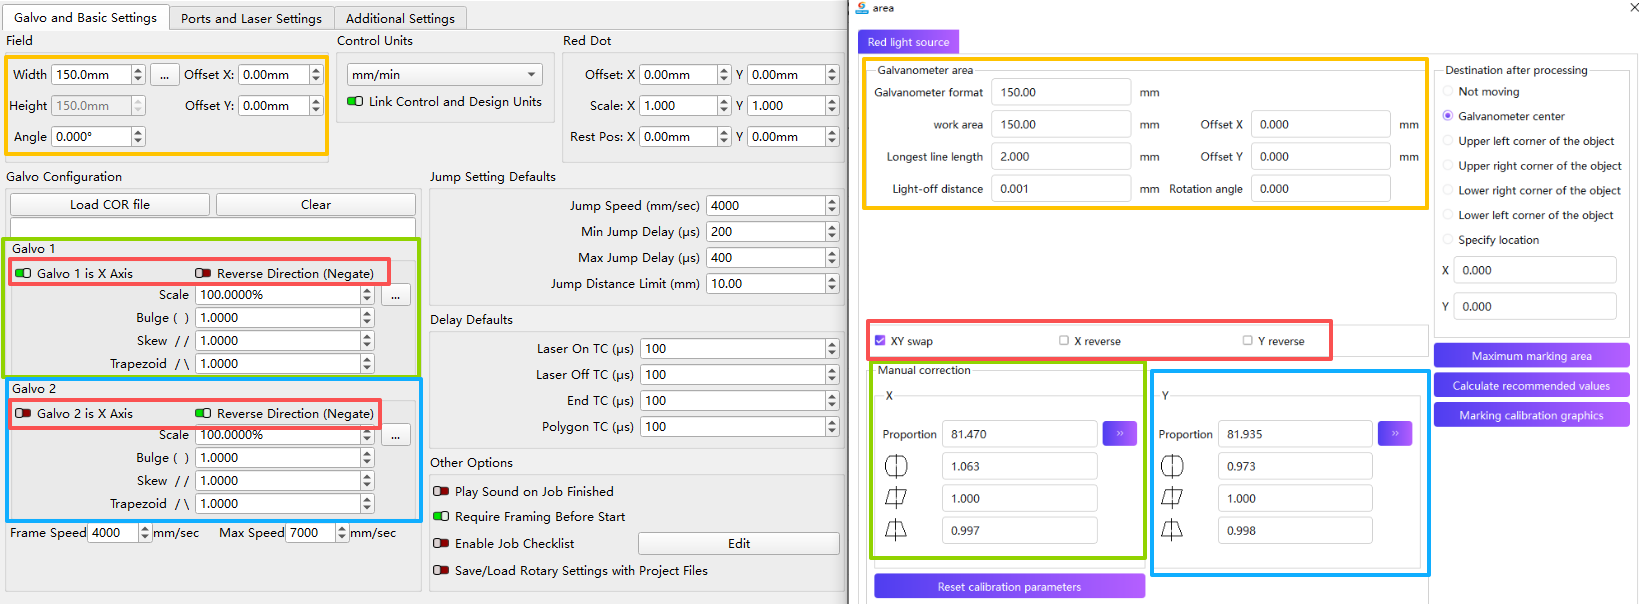
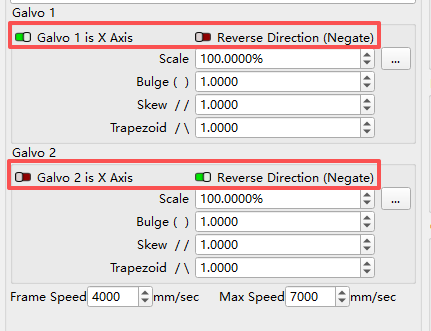
Key Step: You must check Galvo 1 as the X axis and also enable Invert direction for Galvo 2; otherwise the galvo will not work properly.
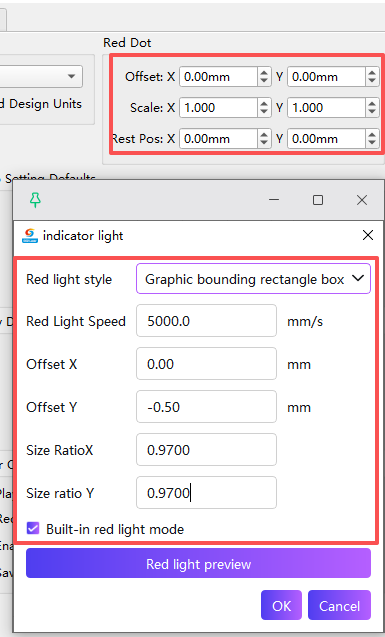
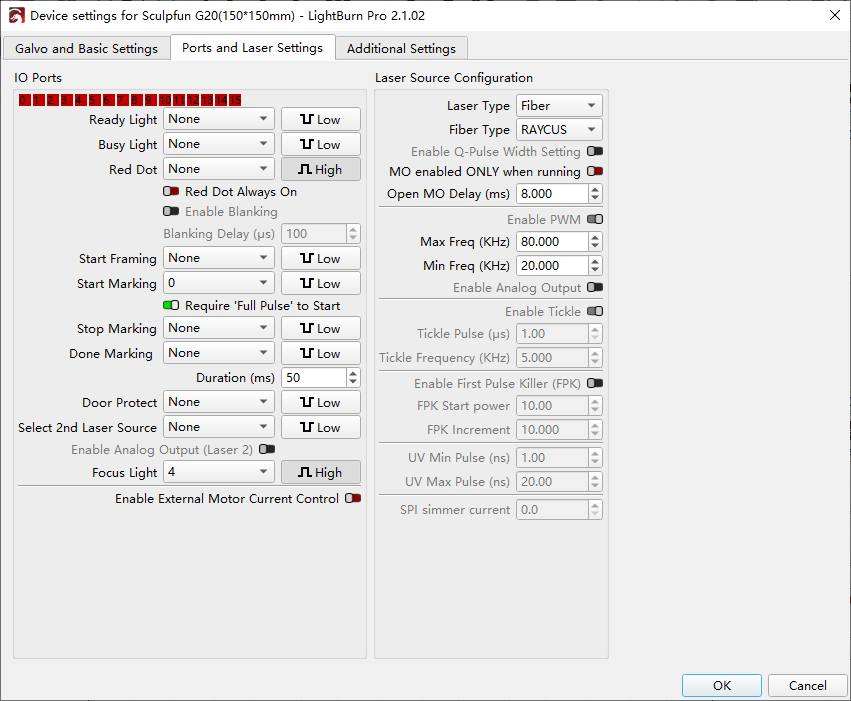
9. Set the Port and Laser Parameters
Switch to the Ports and Laser Settings tab and set the parameters as shown in the figure;
4. Engraving
10. Import Your Artwork and Set the Engraving Parameters
11. Place the Material and Focus
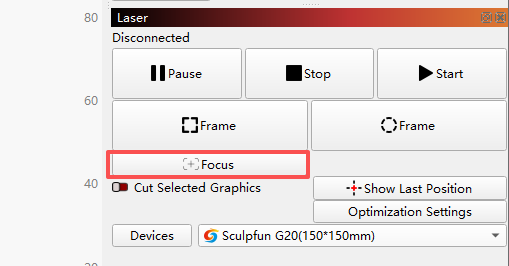
Place the material on the workbed, click Focus to turn on the focus light, and adjust the focus using the red dot indicator so that the material sits at the optimal focal point.
12. Frame Preview
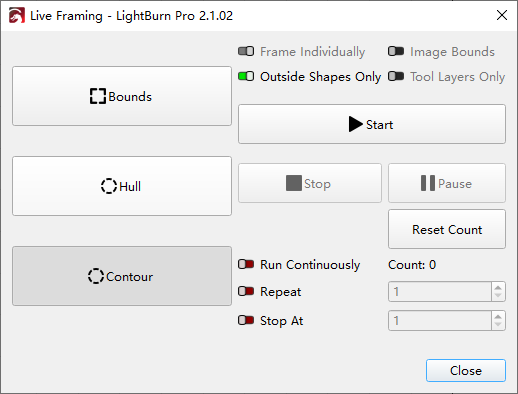
Click the Frame button to open the window, where you can choose different frame modes to preview the work area: Border (a bounding box) and Hull / Contour (a path that follows the shape). Confirm that the position and extent of the graphic are correct before you start.
13. Start Engraving
Once everything checks out, click the Start button to begin engraving.
5. Using Accessories
When the G20 is used with LightBurn, the G9 SE extension kit is not supported.
When the G20 is used with LightBurn, the RA Pro series chuck rotary kit can be used.
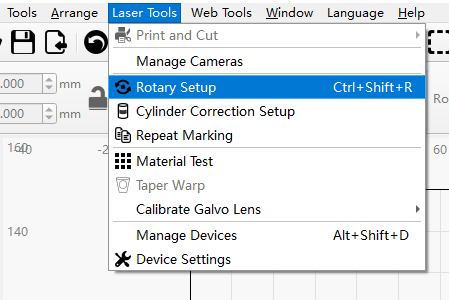
Open Laser Tools→Rotary Setup
Set the parameters as shown in the figure
Turn on the Enable Rotary switch to start using it.
Precautions
Laser Safety: Wear laser safety goggles while engraving and never look directly into the laser; never leave the machine unattended; keep the work area well ventilated.
Software Compatibility: SGD Laser and LightBurn cannot be open at the same time, to avoid software compatibility issues.
Looking After Your Configuration File: The configuration file is bound to the machine SN code and stored on the USB drive included with your machine. If you lose the drive, contact Sculpfun customer service with the SN code to look it up.