Sculpfun Space User Manual
This document mainly introduces the functions of Sculpfun Space and how to operate the machine with Sculpfun Space.
Open the software and click New to create a blank canvas.
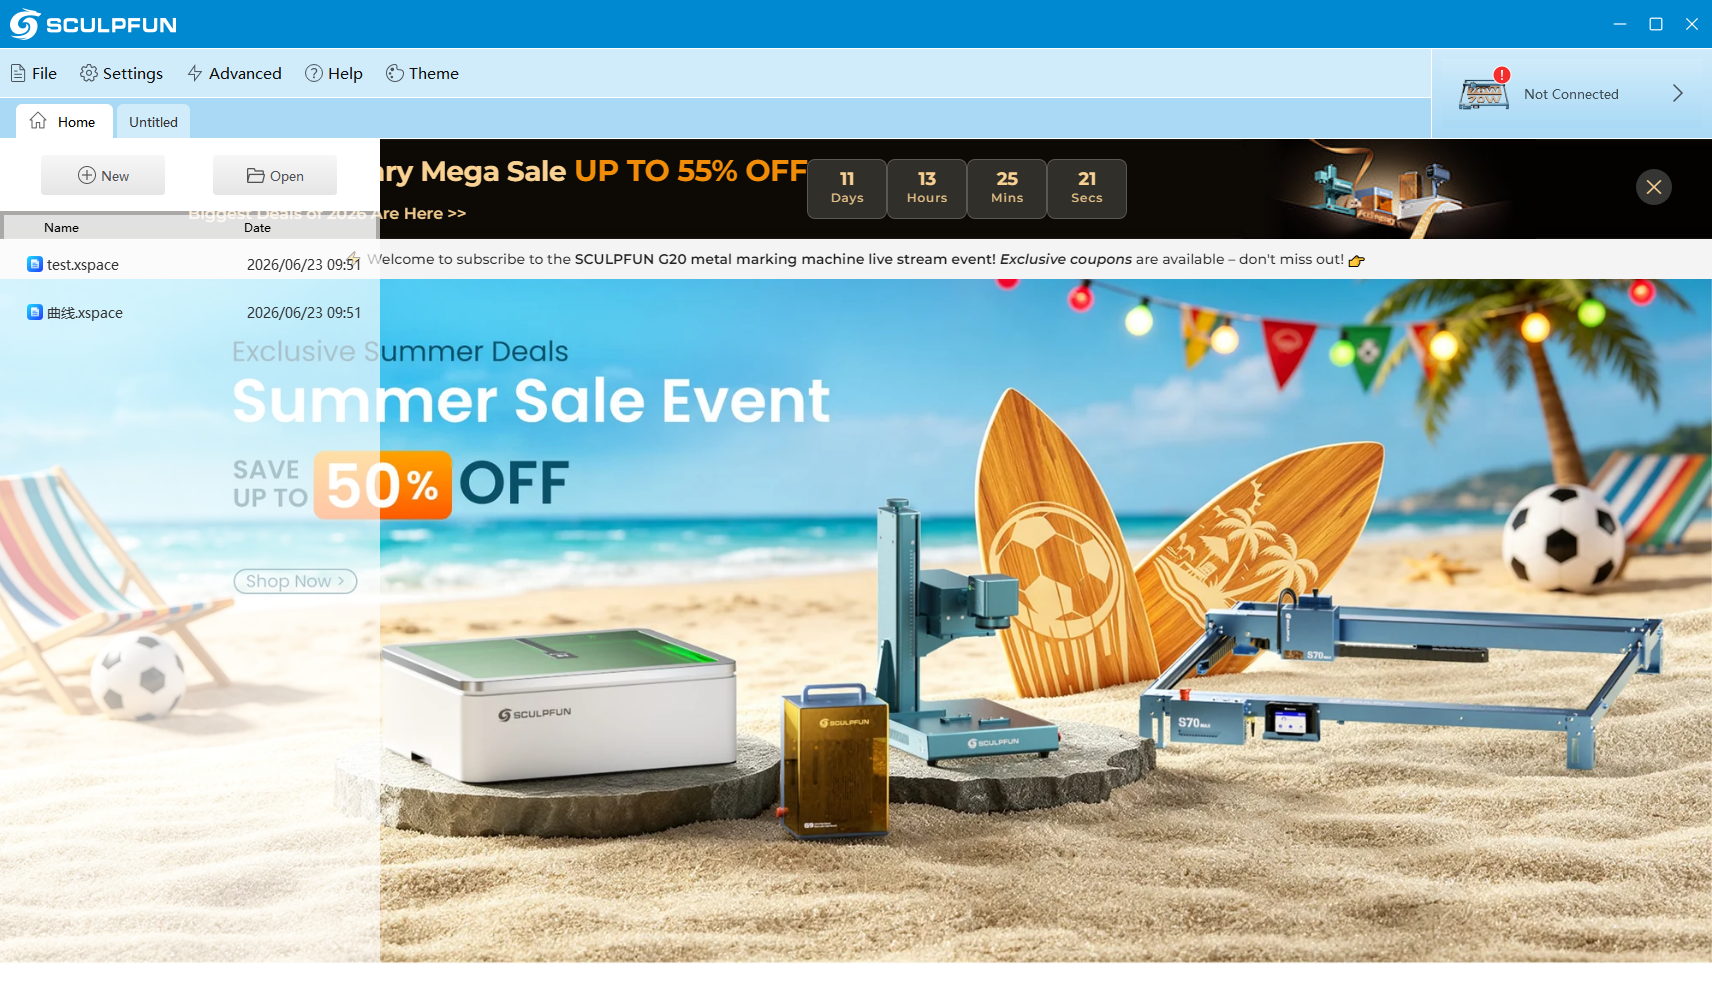
Interface Introduction
Menu Bar
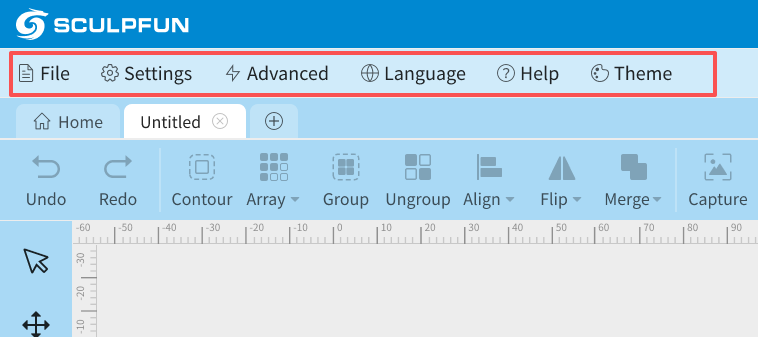
File: Save and open files here. Files can be saved in .xspace or Gcode format.
Settings: Configure general machine parameters.
Advanced: Access GRBL settings after connecting the machine.
Language: The software defaults to English; you can switch to other languages here.
Help: Software license agreement and machine usage support.
Theme: Change the interface color style.
Open Settings.
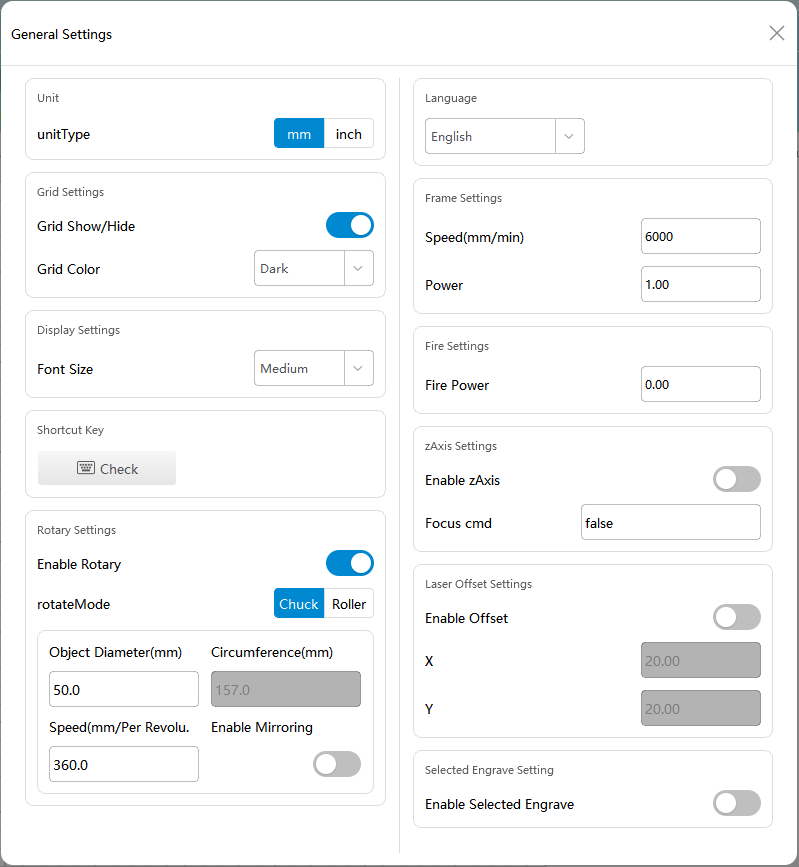
General Settings
Unit: Set to millimeters or inches according to usage habits.
Grid Settings: Adjust the grid display on the canvas.
Display Settings: Adjust the font size of interface text.
Shortcuts: View shortcut key functions here.
Rotary Settings: Configure when using roller or chuck accessories.
Language: Set the software language; default is English.
Frame Preview Settings: Set speed and power for border preview. Default: 1000mm/min, 1%.
Pulse Settings: Set laser power for positioning pulse. Default: 1%.
Z-Axis Settings: Enable the Z-axis function if the machine is equipped with a Z-axis module.
Laser Offset Settings: Recommended for use with laser auxiliary positioning. Offset the laser working position to a specified value (usually aligned to the auxiliary positioning laser).
Selected Engraving Setting: When enabled, only the selected graphics or layers will be engraved.
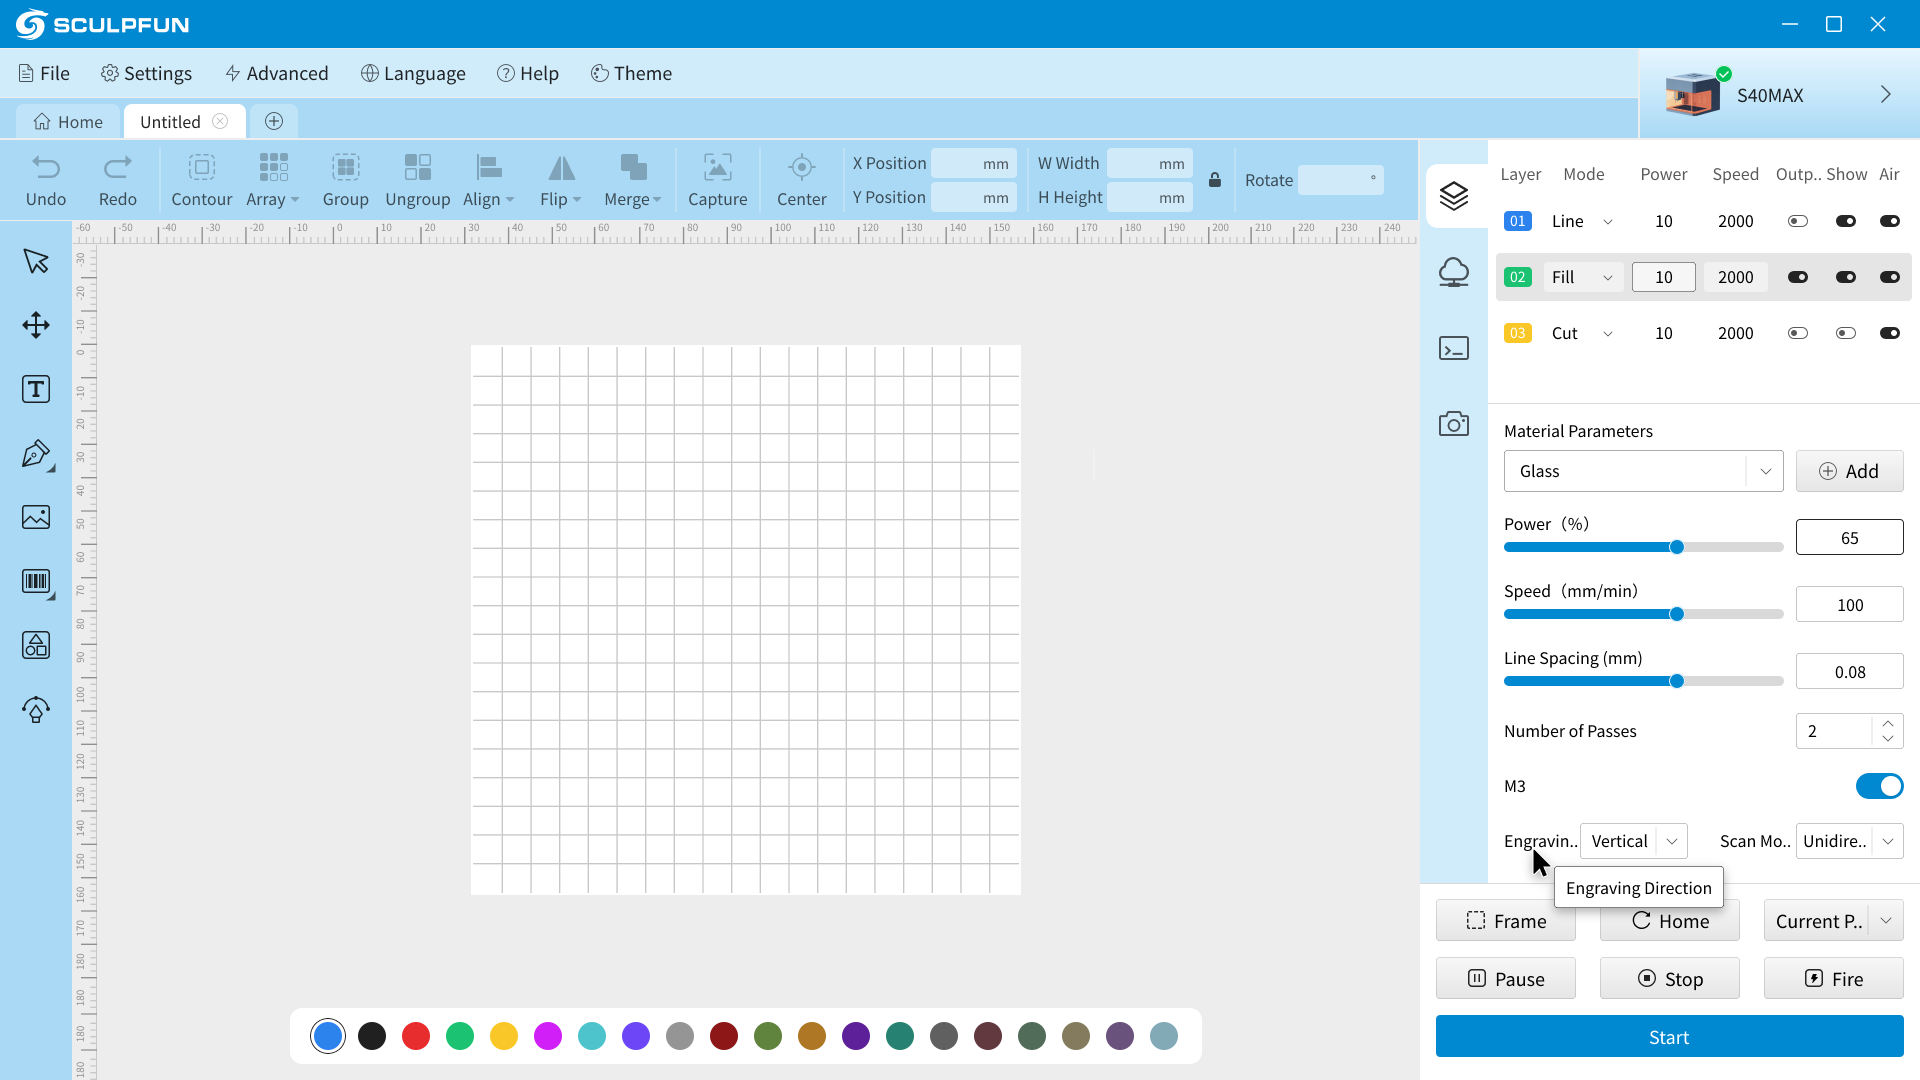
Toolbar
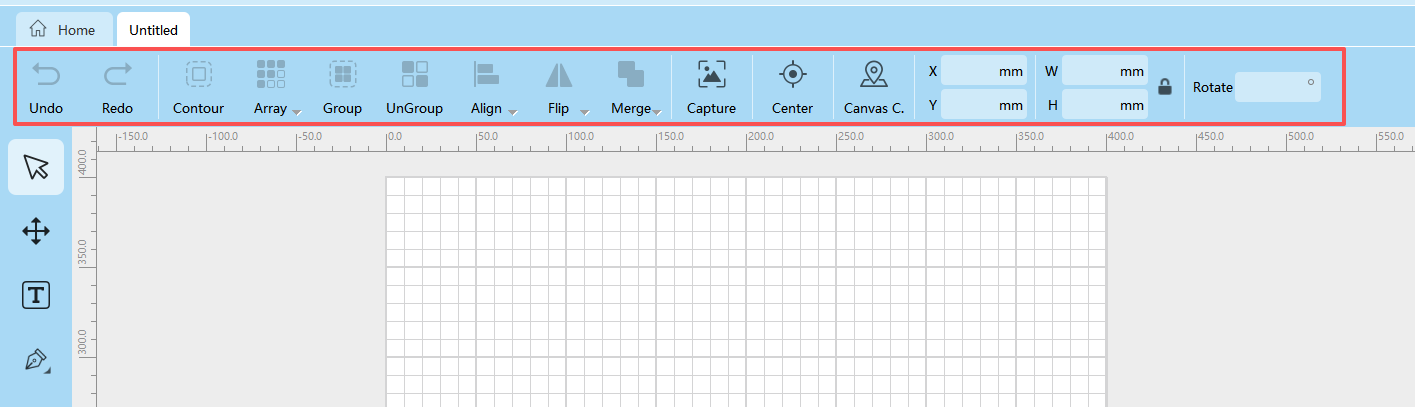
Undo: Reverse the last operation and restore the previous state.
Redo: Restore the undone operation.
Contour: Offset the selected shape to generate a contour at a specified distance.
Array: Copy and arrange selected objects in row, column or circular mode.
Group: Combine multiple selected objects into a whole for unified operation.
Ungroup: Split grouped objects into individual editable elements.
Align: Provide multiple alignment modes such as left align, horizontal align for precise layout.
Flip: Flip selected objects horizontally or vertically.
Merge: Combine multiple shapes into one single graphic. Modes include Union, Intersection and Difference.
Capture: Capture images from the camera (if equipped) and import to the canvas.
Center: Move the selected object to the exact center of the canvas.
Canvas Center: Move the canvas view to the center of the page.
Position: Precisely set X and Y coordinates of selected objects for accurate positioning.
Size: Adjust the width and height of selected objects. Lock to maintain aspect ratio.
Rotate: Precisely set the rotation angle of selected objects.
Left Toolbar
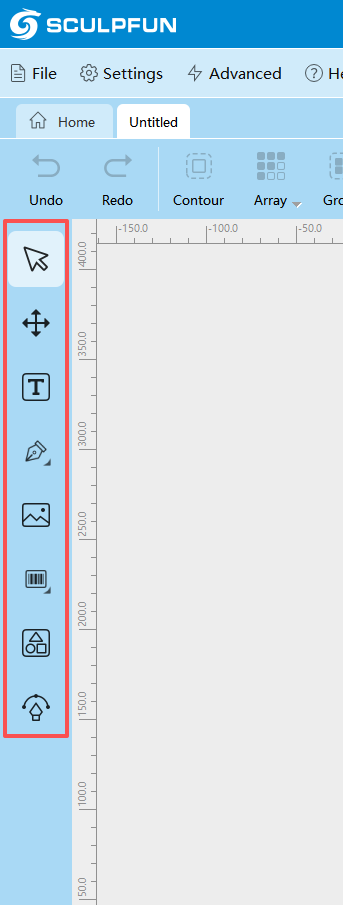
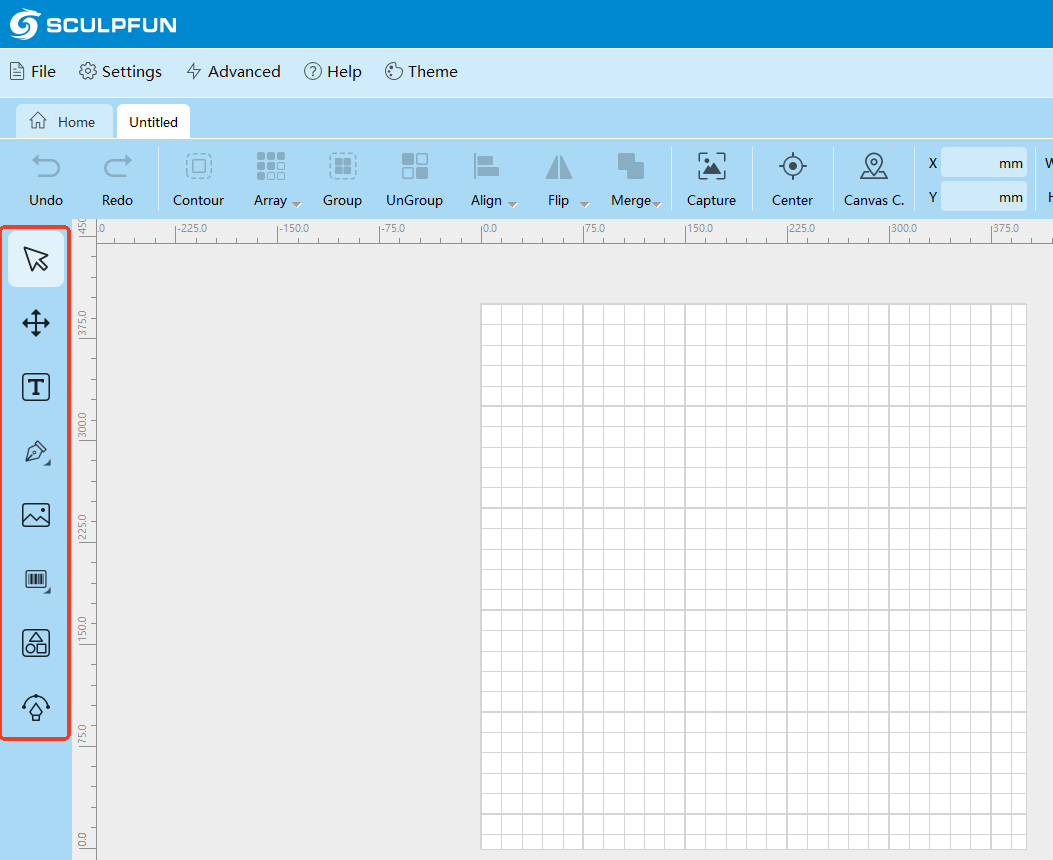
Select: Switch to selection mode to select graphics, text and other elements on the canvas.
Pan: Switch to pan mode to move the entire canvas view.
Text: Insert text boxes to add and edit text on the canvas; support font, size and content adjustment.
Draw: Provide various drawing tools to create custom graphics.
Image: Import pictures and configure related parameters after import.
Barcode: Generate barcodes and QR codes; support editing barcode content.
Material Library: Built-in design materials; users can also add custom commonly used materials.
Vector: Import vector graphics files.
Canvas
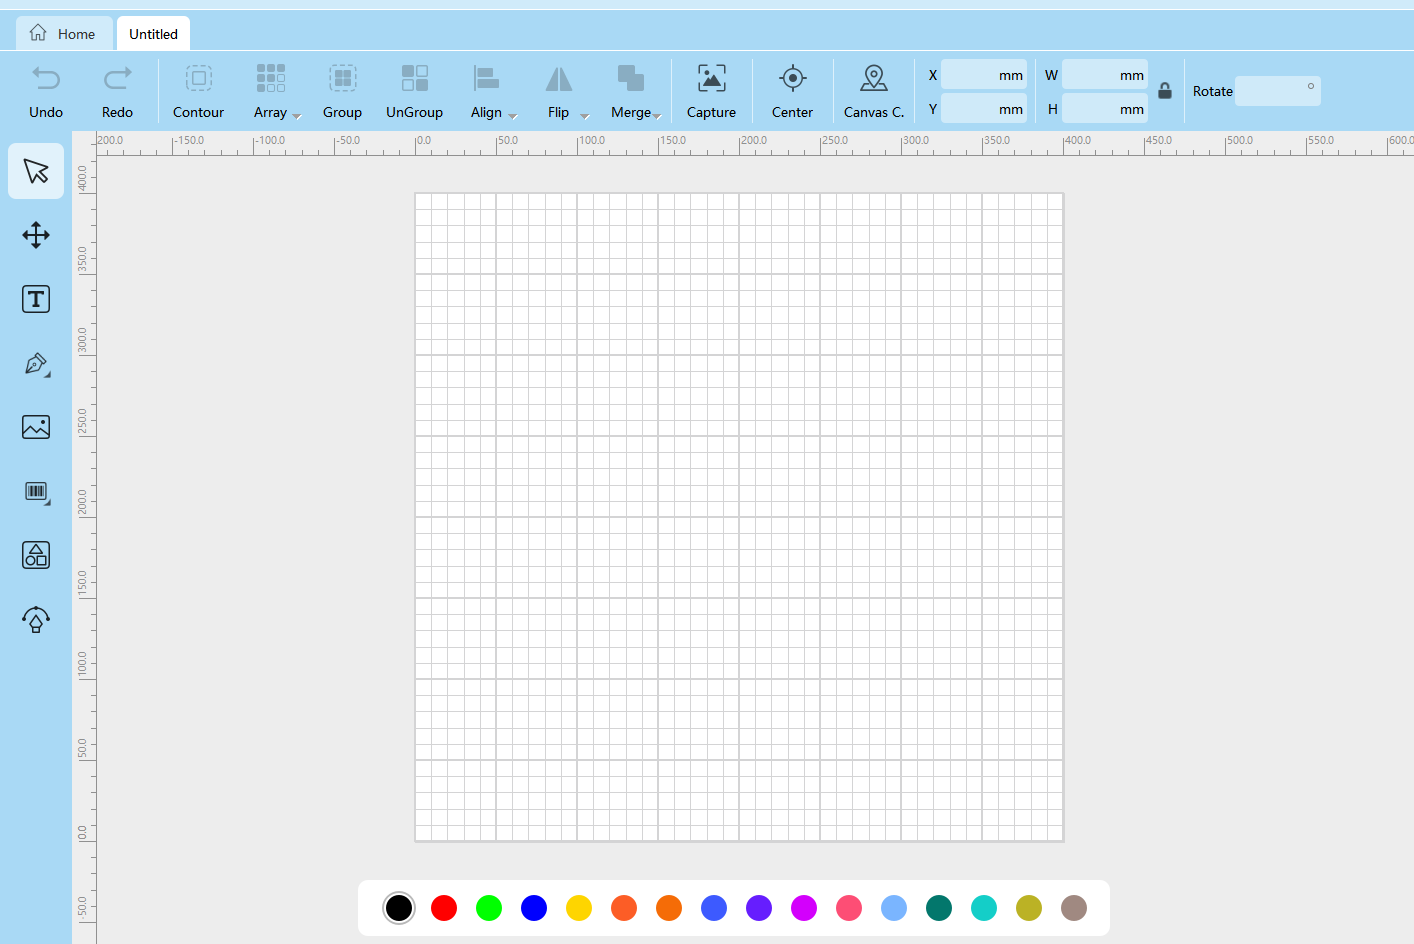
Tab Bar: Switch to the homepage.
Ruler: Located on the left and top of the canvas; units adjust automatically by settings. Used for precise positioning and size measurement of design elements.
Canvas: The core working area for design creation.
Grid: Visual reference lines; can be turned off in settings.
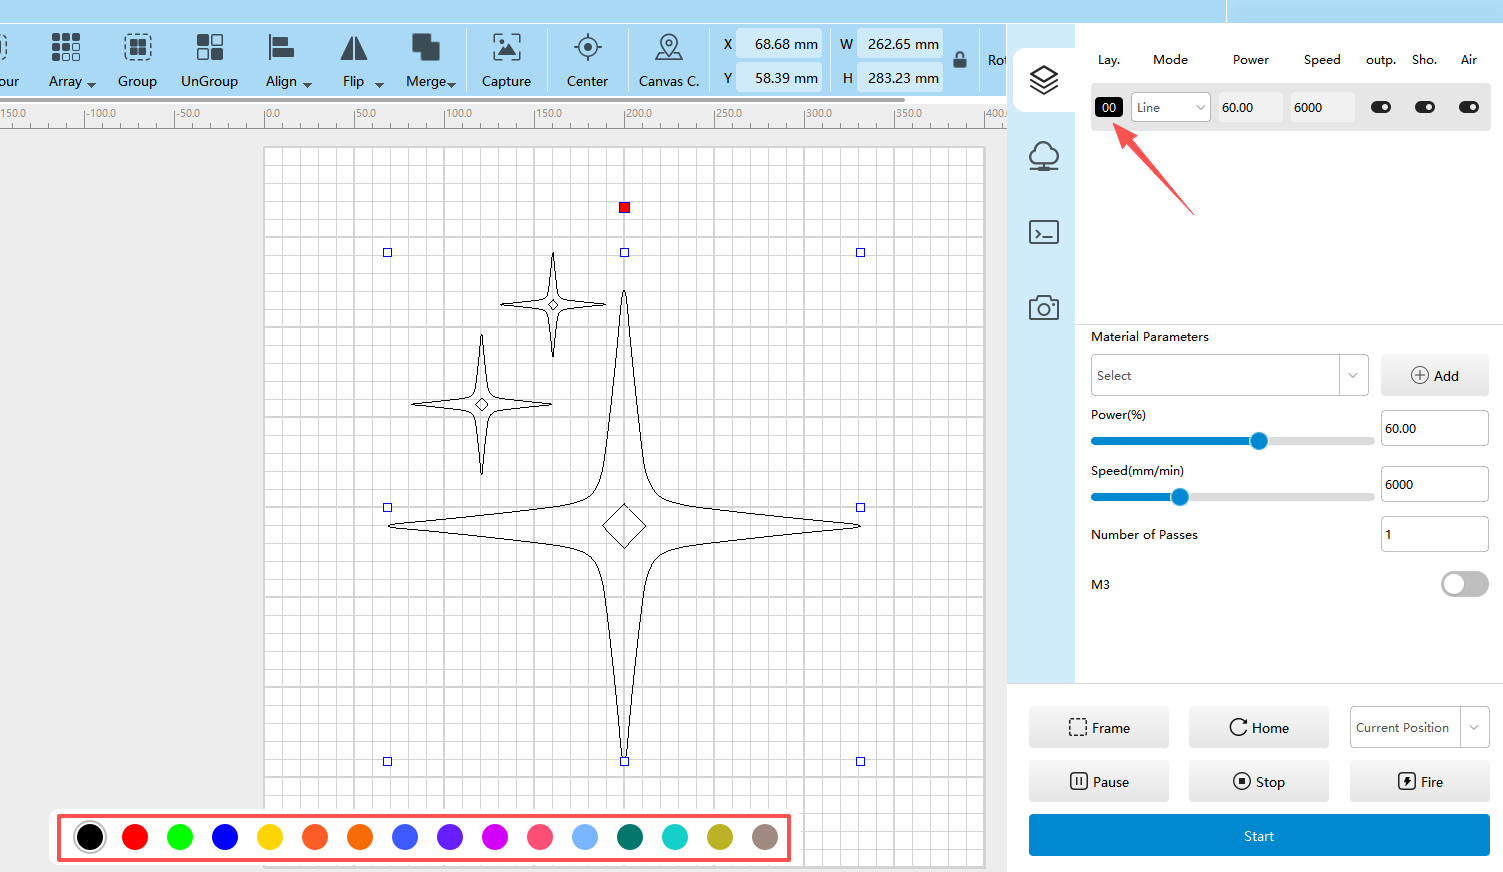
Layers: Located below the canvas. Place different designs on separate layers for easy parameter adjustment.
Console
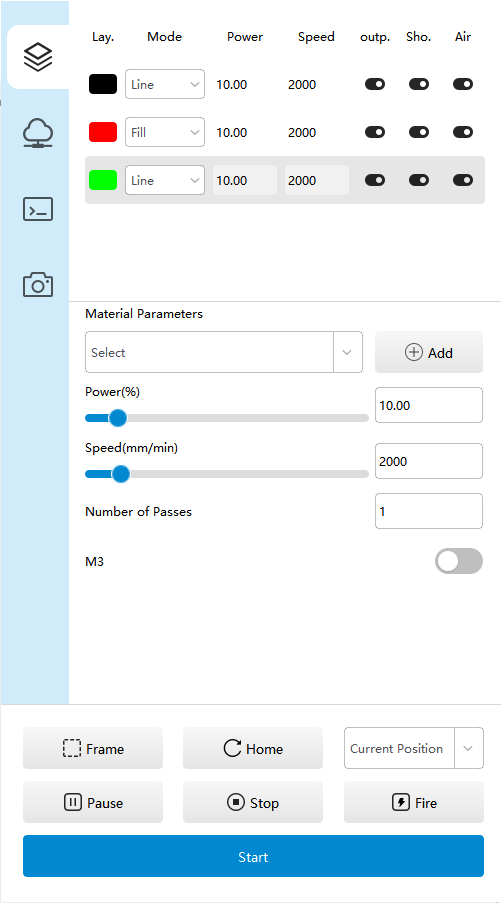
Device Connection: Display current device name and connection status.
Layers: Manage different layers in the design. Set independent working parameters for separate layered processing.
Terminal: Console log area, displaying device running logs, G-code information and error prompts for debugging and monitoring.
Test: For material parameter testing. Adjust test block quantity, range, power variation and other parameters as needed.
Camera: For use with camera accessories.
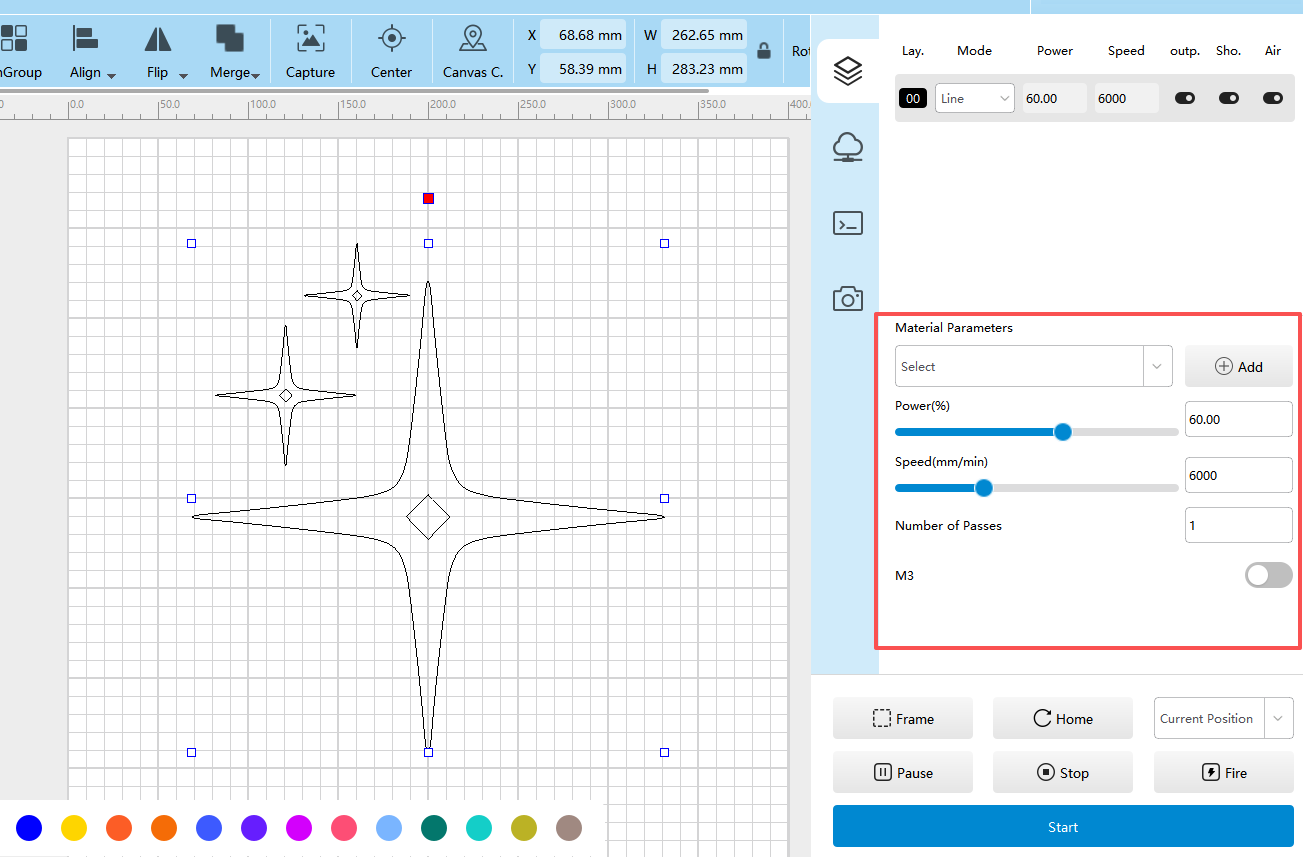
Material Parameters: Use preset material parameters or customize your own commonly used parameters.
Power: Adjust laser output power.
Speed: Adjust laser moving speed.
Line Spacing: The distance between adjacent scanning lines during laser scanning.
Processing Passes: Set the number of repeated processing times. Multiple passes can deepen engraving or complete cutting through materials.
M3: Constant Power Mode. Laser power remains fixed during operation, which may cause burning at deceleration positions. Disable this switch to enable M4 Dynamic Power Mode; laser power adjusts automatically with moving speed to keep consistent energy per unit area.
Engraving Direction: Select horizontal or vertical direction.
Scan Mode: Select one-way or two-way engraving. Two-way mode saves time but delivers slightly lower engraving quality.
Frame Preview: Preview the design bounding box on the material to confirm processing range and position.
Position Pulse: Turn on the laser at 1% power to confirm the laser spot position.
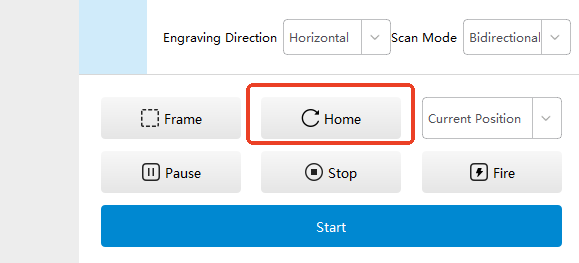
Home: Move the laser head to the machine mechanical origin.
Current Position / User Origin / Absolute Coordinates: Set the starting position for processing.
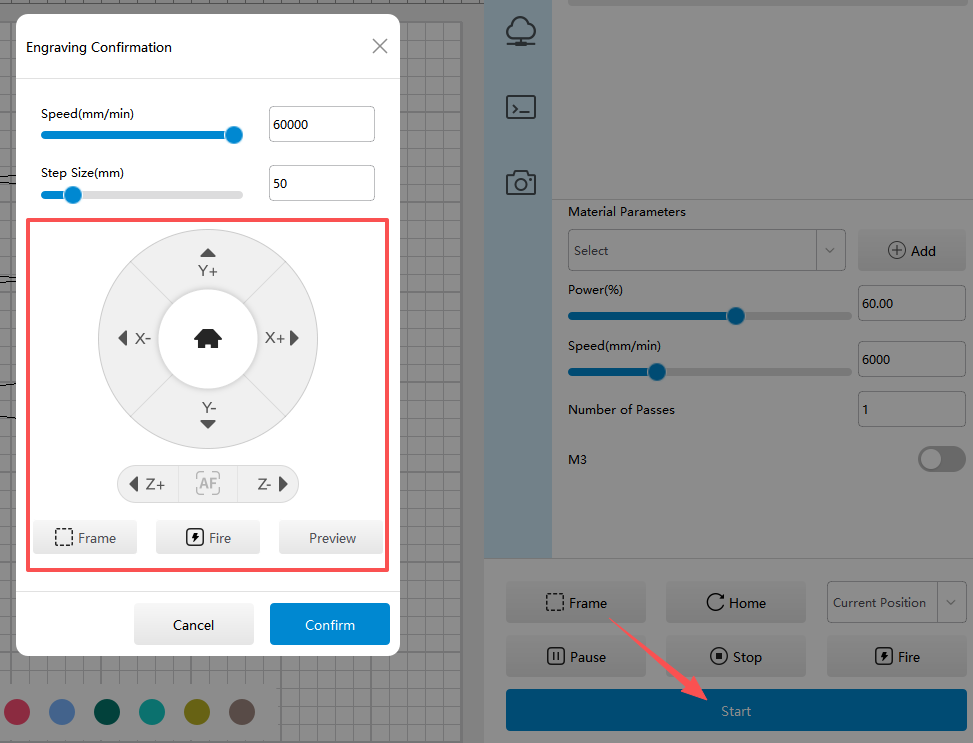
Engrave: Enter the engraving confirmation interface.
Pause: Pause the ongoing processing task.
Stop: Terminate the current task immediately.
User Tutorial (To Be Supplemented):
Import or draw design materials via the left toolbar.
Set up layer division through the layer bar below the canvas.
Adjust design parameters in the console to achieve the desired effect. Parameters require multiple tests; sample parameters are for reference only.
Click Home to reset the laser position, then adjust the laser position manually as required.
Click Frame Preview to check the design position on the material and confirm the processing range.
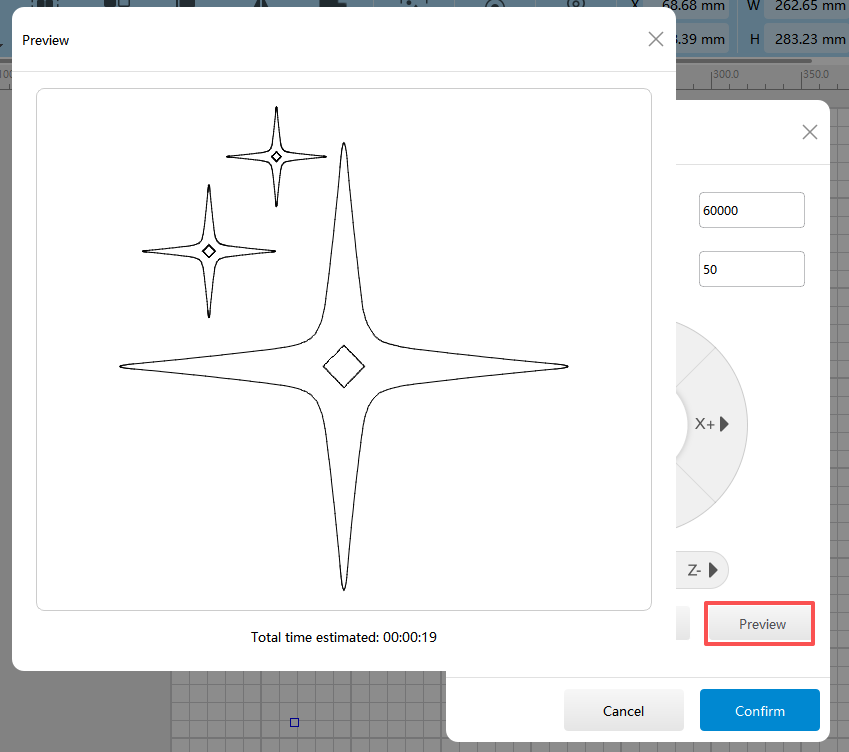
Click Preview to view the finished effect.
Click Engrave to start laser operation and get the finished product.