V5 Advanced Tutorial - Embossing Tutorial
This article will elaborate on the parameters of embossing, and it is recommended to watch the explanatory video: (hyperlink)
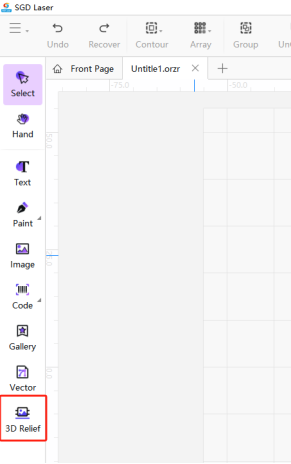
Turn on SGD Laser, create a new canvas, click on 3D Relief, and enter the embossing interface.
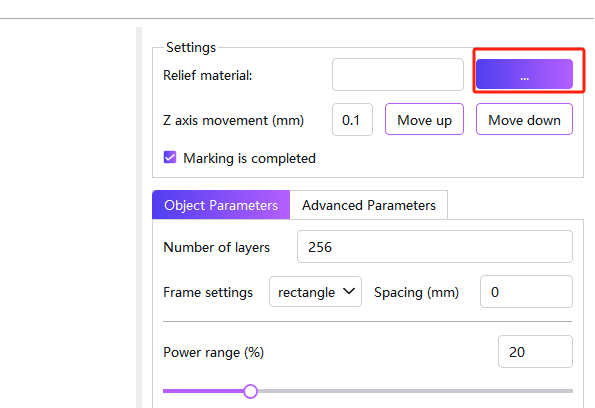
Click to import materials. Materials can be selected from stl, obj, and some image formats.
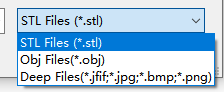
When importing images, they will be automatically converted into relief models. Importing images may result in incorrect size ratios. This feature is still under improvement. It is recommended to import models for embossing.
When constructing a 3D model, relevant parameters need to be set.
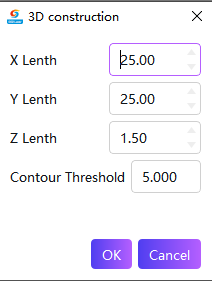
X length: The length of the X axis, which directly determines the length of the model in the X-axis direction
Y Length: The length of the Y axis, which directly determines the length of the model in the Y-axis direction.
The above setting errors may lead to a disproportionate model
Z-axis length: The height of the model, reflected as the engraving depth of the material.
Contour threshold: The threshold for identifying line edge blocks when converting an image into a model. The smaller the value, the higher the recognition accuracy, but it may also increase unnecessary minor imperfections.
After importing the material, proceed with setting the relevant parameters.
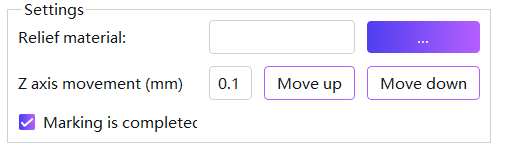
Relief material: You can import relief material. You can choose stl, obj, and some image formats. After importing the image, it will be automatically converted into a relief model.
Z-axis movement: The software controls the moving distance of the z-axis. It is superior to the buttons on the side of the machine but inferior to the z-axis control knob on the column.
Marking is completed: Select whether the laser should return to the position where engraving began after engraving is completed.
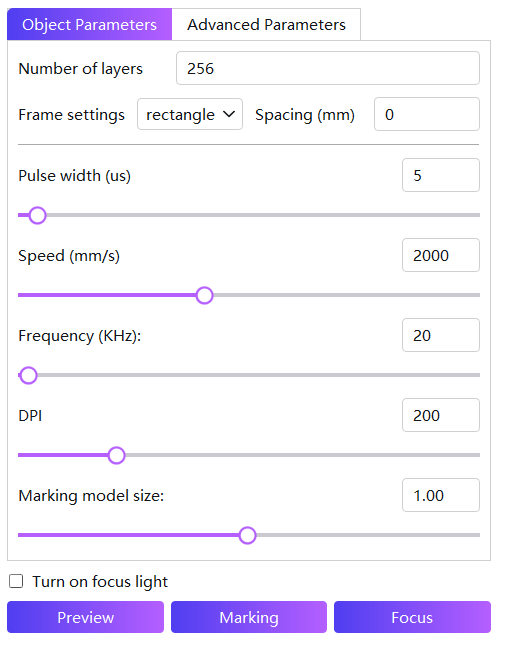
Number of layers: The default is 256 layers. The more layers, the higher the accuracy, but the longer the engraving time.
Outer frame setting: Set the shape of the engraving. Make settings according to requirements such as patterns and materials.
Spacing: The distance between the outer frame and the set value (model edge). + indicates expansion, and - indicates contraction.
Q pulse width (μs): The duration of a single laser pulse. The pulse width affects the peak power and energy output of the laser. A narrow pulse width results in high peak power, making it suitable for fine engraving of tiny structures; a wide pulse width releases energy gently, allowing for deeper engraving.
Speed (mm/s): The moving speed of the laser during engraving. Higher speed leads to higher engraving efficiency, but the details may be rough; lower speed is conducive to fine engraving, but the efficiency is lower. It is important to strike a balance between speed and effect.
Frequency (KHz): The number of laser pulse emissions per unit time. At high frequencies, the pulses are dense, resulting in coherent and delicate engraving lines; at low frequencies, each individual pulse has high energy, making it suitable for deepening marks. Adjustments should be made according to the engraving material and requirements.
Marking model size: Adjust the marking scale of the model. You can observe the marking range on the material through preview.
Preview: Preview the engraving position. At this time, the preview red light will shine on the material, showing the engraving position and size.
Marking: Click to start working.
Focus: The camera uses manual focus, so this button is ineffective.
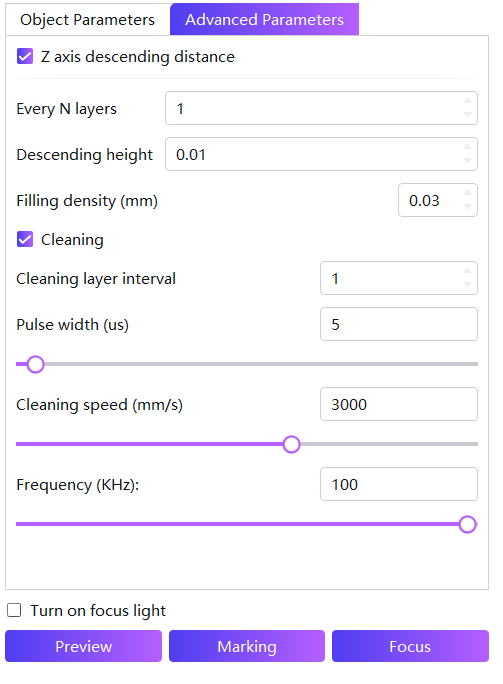
Z-axis descending distance: When not turned on, the laser will not automatically descend and will only operate at a fixed height. Once turned on, the laser will descend according to the parameters to ensure the laser focal length is at the correct working position.
Among them, every n layers: After engraving the set number of layers, execute the operation to decrease the height. Decrease height: The distance decreased when executing the operation to decrease the height.
Filling density: The spacing between lines filled in each layer. The smaller the value, the denser the filling, but the longer the engraving time. A balance needs to be struck between time and engraving effect.
Cleaning: Clean the engraving material to remove dust, imperfections, etc. Cleaning is typically performed immediately after the engraving of a layer is completed, before engraving the next layer.
Cleaning layer interval: Perform cleaning after engraving the set number of layers.
Pulse width: The duration of a single laser pulse. The pulse width affects the laser's peak power and energy output. A narrow pulse width results in high peak power, making it suitable for fine engraving of tiny structures. A wide pulse width releases energy gently, allowing for deeper engraving. Wide pulse width is generally used for cleaning.
Cleaning speed: The moving speed of the laser during engraving. Faster speed leads to higher engraving efficiency, but the details may be rough; slower speed is conducive to fine engraving, but the efficiency is lower. Adjust according to needs.
Frequency: The number of laser pulse emissions per unit time. At high frequencies, the pulses are closely spaced, resulting in coherent and delicate engraving lines; at low frequencies, each individual pulse has high energy, making it suitable for deepening marks. Generally, high frequencies are used for delicate finishing.