V5 Software User Guide for LightBurn
Instructions
For software installation, please refer to the LightBurn software installation tutorial.
When using LightBurn V5, only planar carving/cutting is supported; wood relief and crystal internal carving are not supported. A 150mm field lens is recommended.
Import Configuration
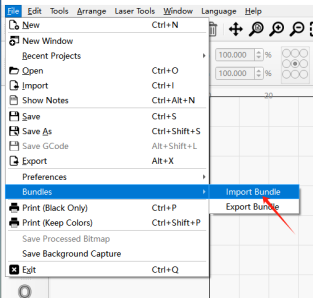
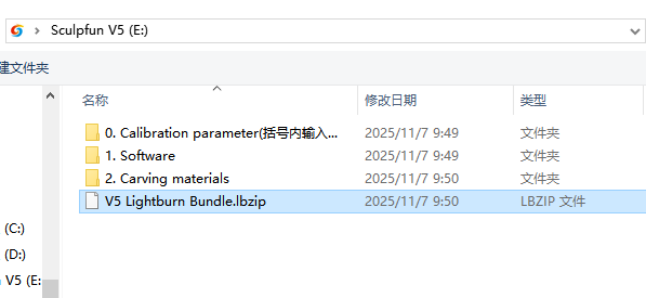
After entering the software, import the configuration file from the V5 USB drive. Select File in the upper left corner - Bundles - Import Bundles.
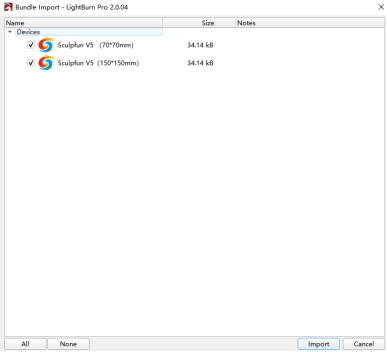
Taking the modification of 150mm field lens parameters as an example, the modification method for 70mm field lens parameters is the same.
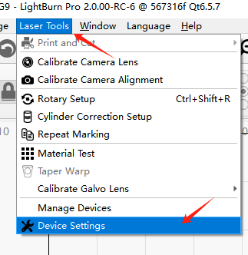
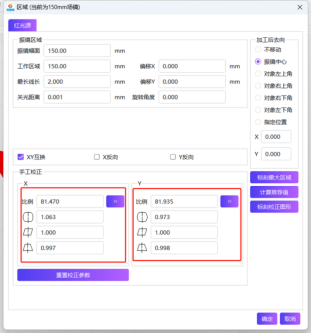
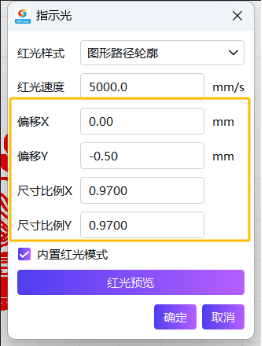
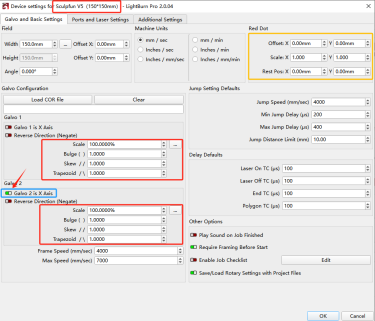
Open Laser Tools - Device Settings, and modify the relevant parameters in LightBurn to the parameters shown in the image on the USB drive that came with the V5 machine - Calibration parameter - 150mm lens.
|
U盘文件 |
LightBurn配置 |
|---|---|
|
|
|
|
|
↑ Note that the X-axis switch of Galvo 2 needs to be turned on here. |
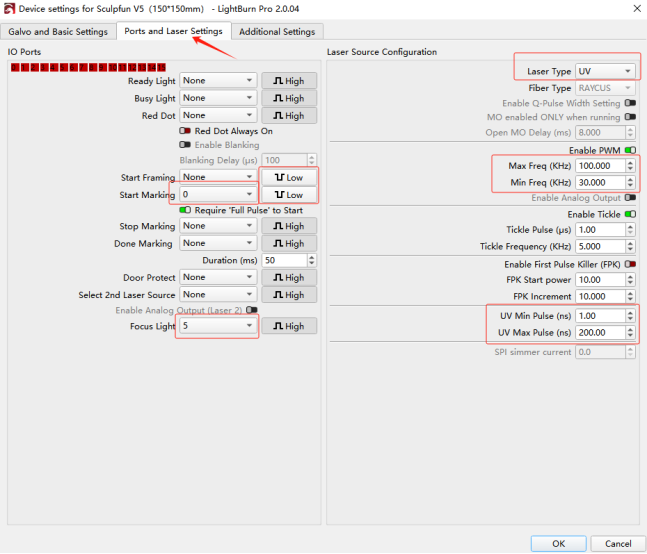
Go to the port and laser settings, as shown in the diagram, which you can also find in the instruction manual.
Work interface
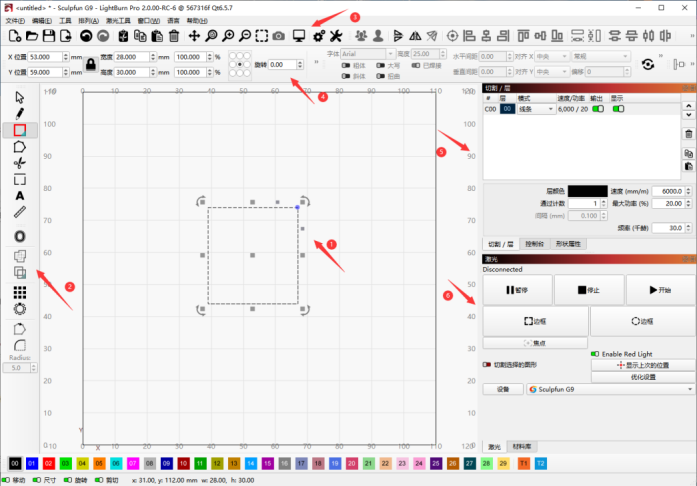
1. Canvas: The work area.
2. Drawing tools: Allows for basic pattern drawing and transformation.
3. Function area: Integrates the software's basic functions.
4. Editing area: Allows for editing parameters of patterns and text.
5. Layer cutting area: Allows for layering content on the canvas, adjusting layer processing modes and parameters. It can also switch to other areas.
6. Laser layer area: The main area driving the machine's operation. It allows for machine control.
1. Set the layer containing the pattern or text.
2. Select the working mode, including line, fill, offset fill, image, etc.
3. View the speed and power; double-click to open detailed settings.
4. Output switch: determines whether this layer is processed when the laser is working.
5. Display switch: determines whether this layer is displayed on the canvas.
6. Processing parameter settings: allows you to set some key parameters.
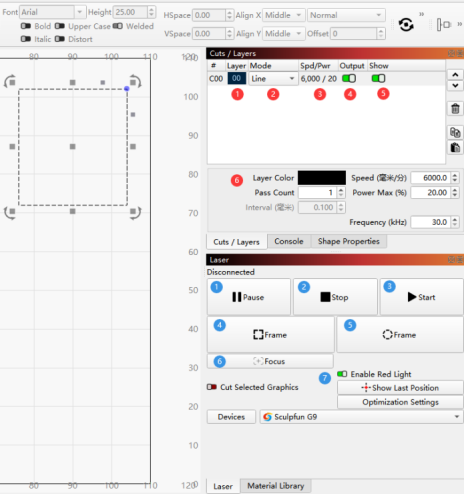
1. Pause: Pauses machine operation during processing. You can resume your previous work after restarting.
2. Stop: Stops machine operation during processing. It will resume after restarting.
3. Start: Begins processing.
4. Rectangle Frame: The machine uses a laser to draw the working area for user adjustments.
5. Polygon Frame: The machine uses a laser to draw a slightly more detailed working area for user adjustments.
6. Focus : Turns the focus red light on or off. This button is not available on the V5, which uses manual focus.
7. Other Settings.
Operation Steps
1. Draw or import the pattern to be cut and engraved onto the canvas.
2. In the Cut/Layer section, adjust the layer, set the cutting mode, and adjust the laser movement speed, frequency, pulse, and other data. The pulse range is 1-24 nanoseconds; the frequency is 30-150kHz.
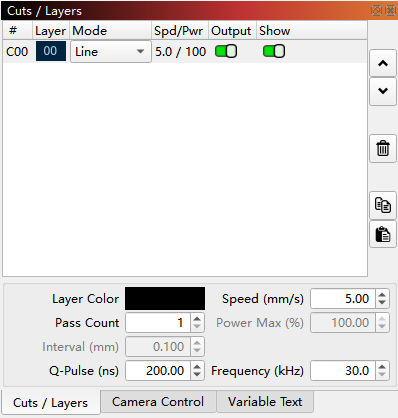
3. Place the materials and focus the machine; turn on the machine's focus light and control the Z-axis movement until the two points coincide.
4. Click on the border to view the engraving position and size, and adjust the materials to achieve the desired effect.
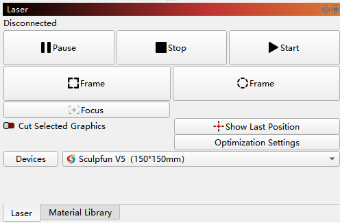
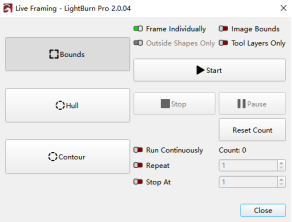
5. Click Start, and the machine will begin working. Please wear safety goggles to protect your eyes.